Past, Present and/or Future
Past, Present and / or Future is the title for the GCSE Fine Art mock exam project. You will have a period of approximately 10 weeks to develop your ideas through preparatory studies before spending a day in the Art department realising your final outcome as part of the controlled assessment. You should aim to be ambitious in your final outcome and presentation.
Task 1: Relief Print
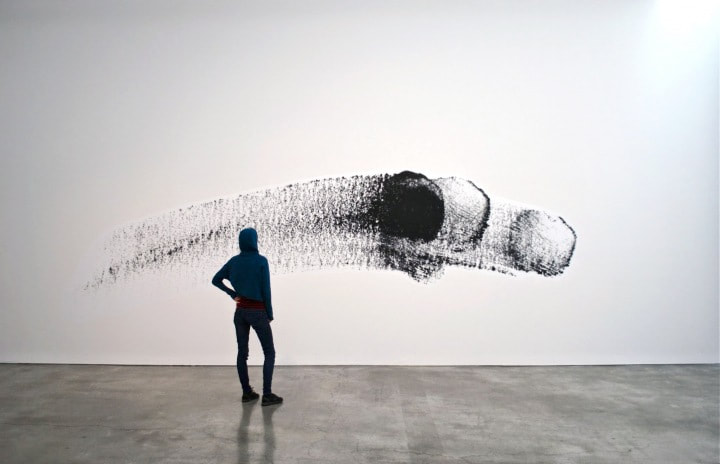
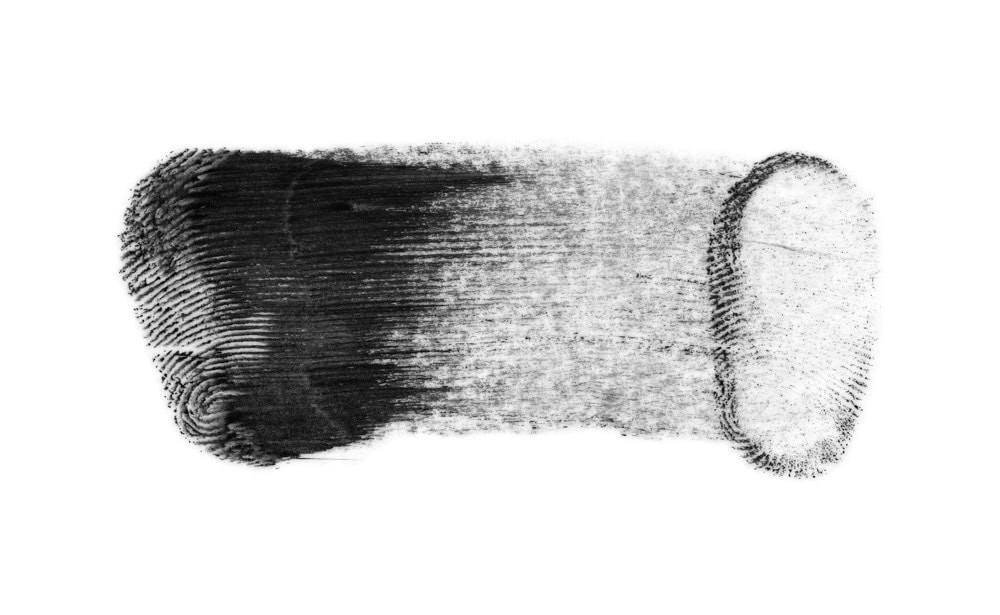
Use the black ink to print from your finger. Explore rolling your finger to capture more of your print.
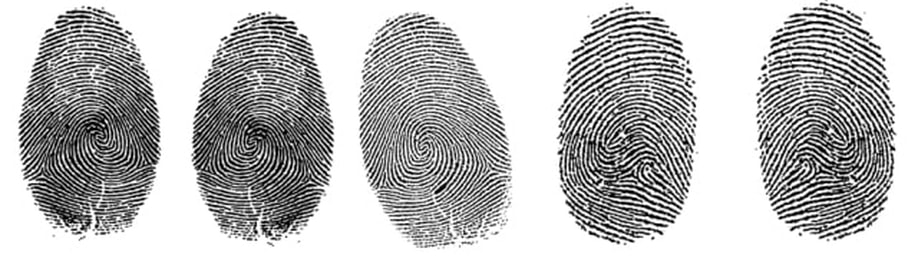
Transfer an enlargement of your finger print onto polyboard. Then, using a biro, impress / shade all the negative space.
|
|
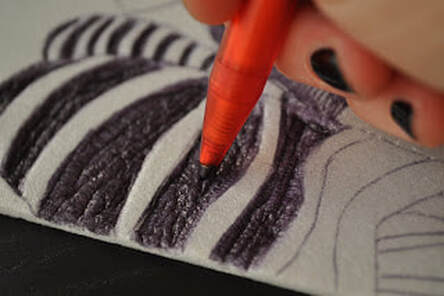
Print on a variety of papers and in different colours. Try to have three GOOD prints
|
Choose your best print or collage the different prints together.
Add personal stories and memories, details about your family, names of friends, your plans for the future. Think carefully where this information goes and consider colour and scale. |
|
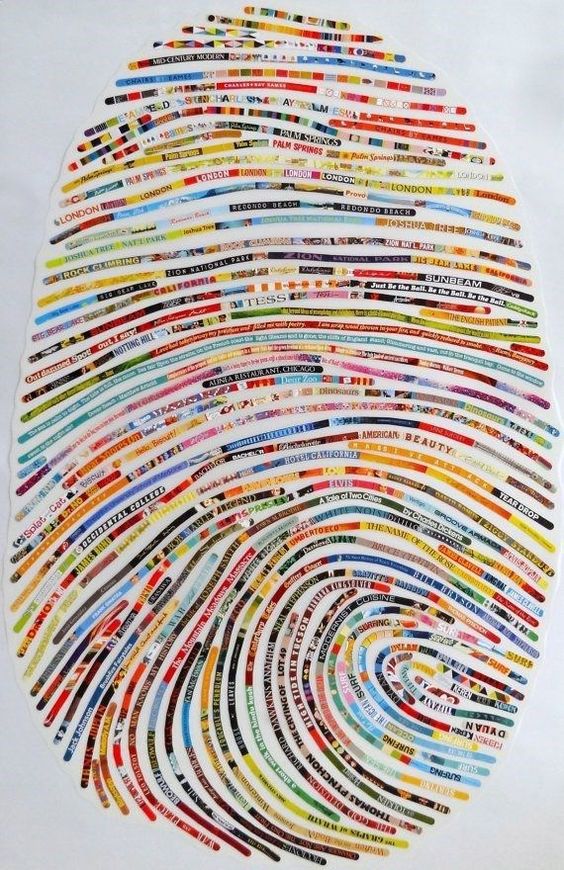
Artist Link: Evan Roth
‘Multi-Touch Paintings‘ (2012) is a series of artworks by Evan Roth that were created by performing (and recording) routine tasks on a smartphone. The fingerprint smudges capture the essence of the gestures we all use daily to perform commons tasks like: unlocking our phones, typing messages, and even playing games like Angry Birds.
|
|
Homework
Part 1: Research the work of Evan Roth and present your research carefully in your sketchbook. Use this worksheet to help you (Your teacher will also upload it to your google classroom). You are welcome to do further independent research and write more in your own words. Use the links below to help you.
Extension: How does the work of Evan Roth link to the theme, Past, Present & Future?
Extension: How does the work of Evan Roth link to the theme, Past, Present & Future?
| evan_roth_analysis.docx |
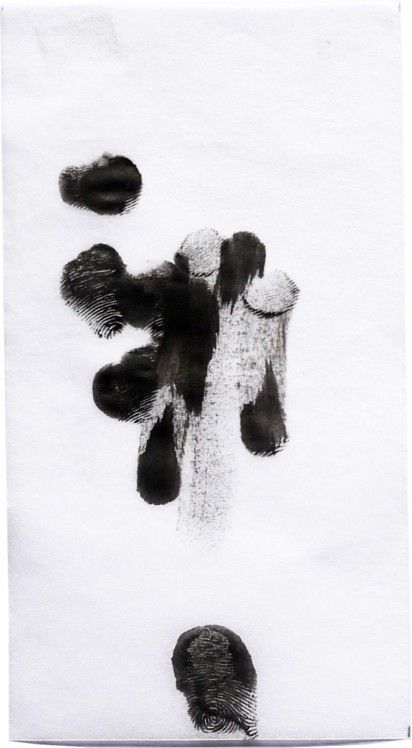
Part 2: Using the piece(s) of acetate provided by your teacher (and some ink or paint that you may have at home), record your swiping and tapping on your smart phone. Present this in your book as a response to Evan Roth.
Extension: What do you notice about the marks that you make?
Extension: What do you notice about the marks that you make?
Task 2: MonoprintingThe beauty of monoprinting lies in its spontaneity and its allowance for combinations of printmaking, painting and drawing media.
Task 1: Monoprint from one of the images brought from home. You could explore using different marks to pick up the ink on the reverse in different ways.
Task 2: Ghost Print After you have removed the paper from your inking palette with the completed image and put it aside to dry, you can create a Ghost Print. A Ghost Print is made from the residual ink left on the inking palette. This allows you to get two images out of one monoprint. |
|
Tracey Emin
Task 3: LinoLino printing is a form of fine art printmaking where the printing plate is cut into lino. The lino is then inked, a piece of paper placed over it, and then run through a printing press or pressure applied by hand to transfer the ink to the paper. The result, a linocut print. Because it's a smooth surface, the lino itself doesn't add texture to the print.
|

|
| |||
John Gledhill
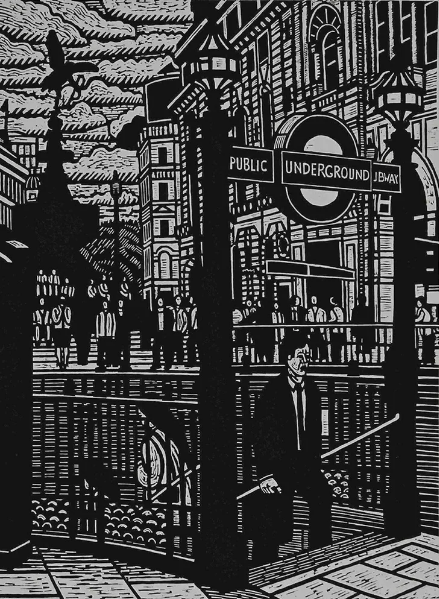
This print is a view of Piccadilly (the famous road in central London) just outside the Royal Academy of Art where John Gledhill trained and still draws each week.
|
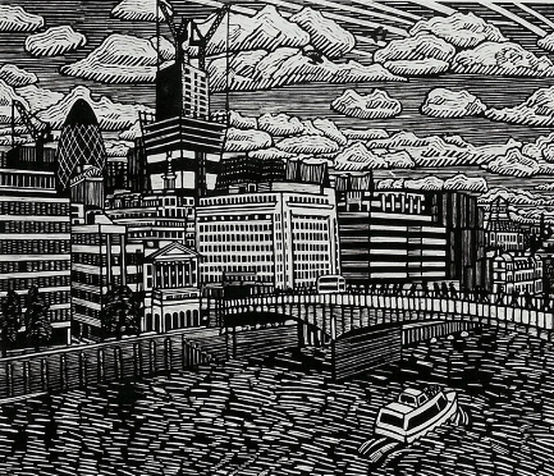
This is a view from the south bank of the Thames close to John Gledhil's studio. It includes the then partly buit building at 20 Fenchurch Street, a commercial skyscraper in London that takes its name from its address on Fenchurch Street, in the historic City of London financial district. It has been nicknamed The Walkie-Talkie because of its distinctive shape.
|
What's next...?
Once you have completed the tasks set by your teacher you need to consider three starting points for your own response to the theme. Each idea must be supported by a link to an artist and your own images. Look through the slide show and the links below to help you. Having said this, you can choose to build on any of the processes and themes visited during the set tasks above.
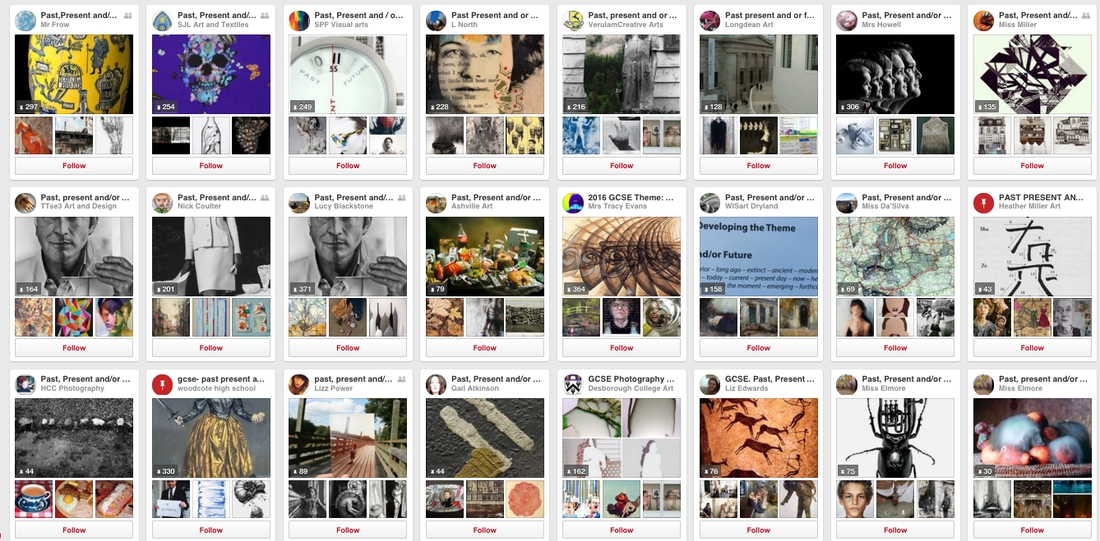
The Art department loves Pinterest. It's a great way to collect images, artists and ideas relevant to a theme. Make a free account then search for the exam theme. You will come across an infinite number of 'pins' that are relevant. If you select to search for boards you will discover Art teachers and GCSE Art students from all over the country who have already gathered own images in response to Past, Present and / or Future (it was the exam paper in 2016). Click on the screen grab below to see for yourself.
OR
You can follow the Art Department Project
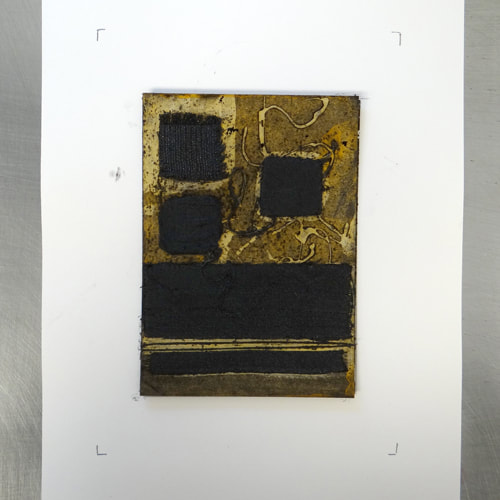
Collograph Printing
Collagraphy is a really versatile printing process in which a textured plate is inked up and put through a press. Different textures hold varying amounts of ink and print different tones. Anything with a low relief texture can be stuck down and used: wallpaper, leaves, fabrics, tapes and threads etc. The collagraph plate is then varnished and can be printed intaglio or relief.
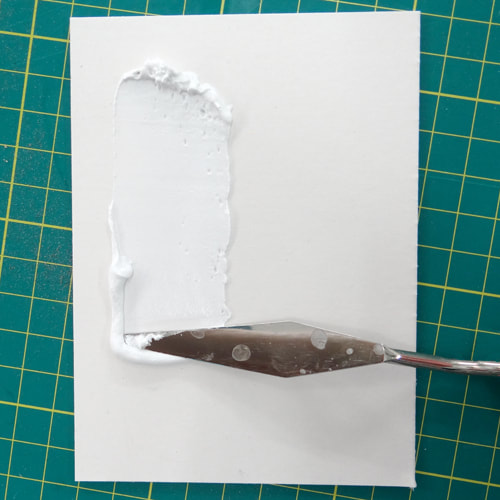
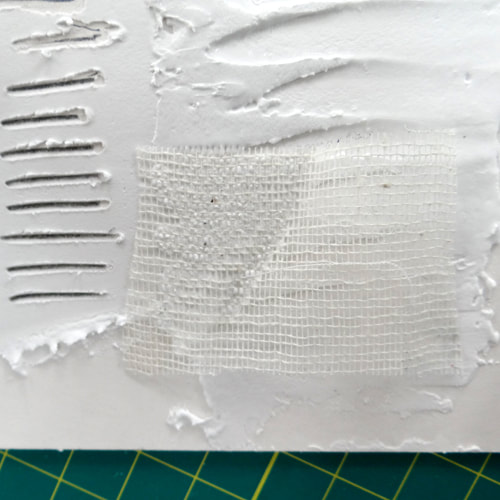
Step 1Start with a piece of card cut to size. Begin choosing and cutting down the materials to stick on top. Stick your fabric down with PVA glue. Take care where you paste your glue as areas of PVA will print differently when inked up.
Another way of creating a textured collagraph plate is by using filler. Use a palette knife to spread a thin layer of paste onto the block. The edges of the filler will create the most contrast in your print so use them creatively. Pressing objects and fabrics into the filler will change the texture of the plate. |

|
Step 2When your plate is completely dry (this usually takes a couple of hours) it is ready to be varnished. Shellac works very well at protecting and strengthening the plate and making it wipe-able.
|

|
Step 3Again, allow your plate to dry completely (another few hours) and then you are ready for inking. Prepare your paper by soaking it in a tray of water.
|

|
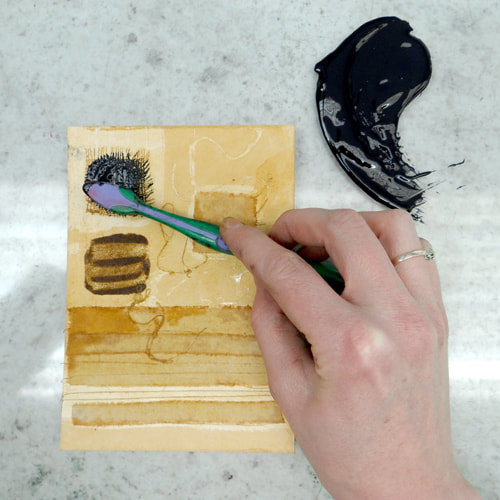
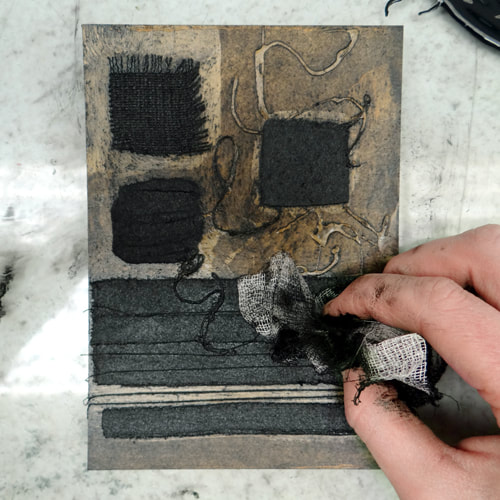
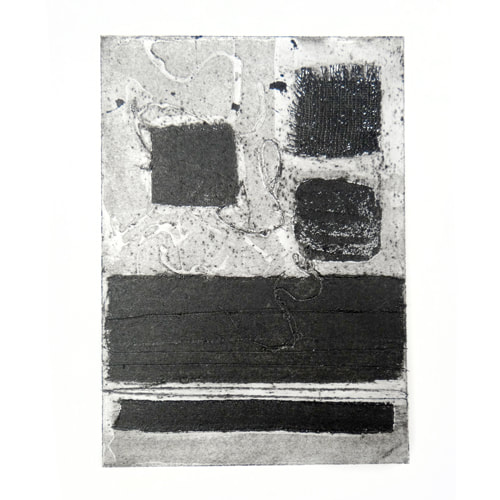
Step 4Work the ink into the plate with a stiff brush. Pay particular attention the areas that you want to hold the ink. Work the ink into the plate using a piece of scrim (fabric). Use the scrim to begin to clean the ink off the 'plate' and any other areas that you want pale. Finish by using a clean piece of fabric to clean the edges and any areas that you would like to print as close to white as possible.
|
|
|
Step 5
When your plate is inked up, place it on the press bed. Remove your paper from the tray. Blot between pieces of newsprint. You want the paper to be damp but not wet. This way it will draw the ink out of the recessed areas of the plate.
Put your paper on top of the plate and through the press.
Remove your print to see the result! If the pressure is correct, you should see an embossing on the back of the paper but none of the areas should have pushed all the way through! If your print is very pale there may not be enough pressure.
If your print is too dark and sticky there is too much ink and your plate needs more cleaning before printing. You will need to re-ink your plate before printing again.
|
|
