A2 Photography Exam: TRUTH, FANTASY AND FICTION
Truth, Fantasy and Fiction is the 2016 title for the A2 Photography exam project (Unit 4). You will have a period of 8-10 weeks (plus the Spring half term and Easter holiday) to develop your ideas through preparatory studies before spending two days in the studio realising your final outcome as part of the 12 hour, controlled assessment. You should aim to be ambitious in your final outcome and presentation.
The exam paper is full of ideas to help you get started. Your photography teachers will also set class and home work tasks that will enable you to have the best start possible for your exam project. Make sure everything is documented clearly on your weebly.
The exam paper is full of ideas to help you get started. Your photography teachers will also set class and home work tasks that will enable you to have the best start possible for your exam project. Make sure everything is documented clearly on your weebly.
Starter Homework
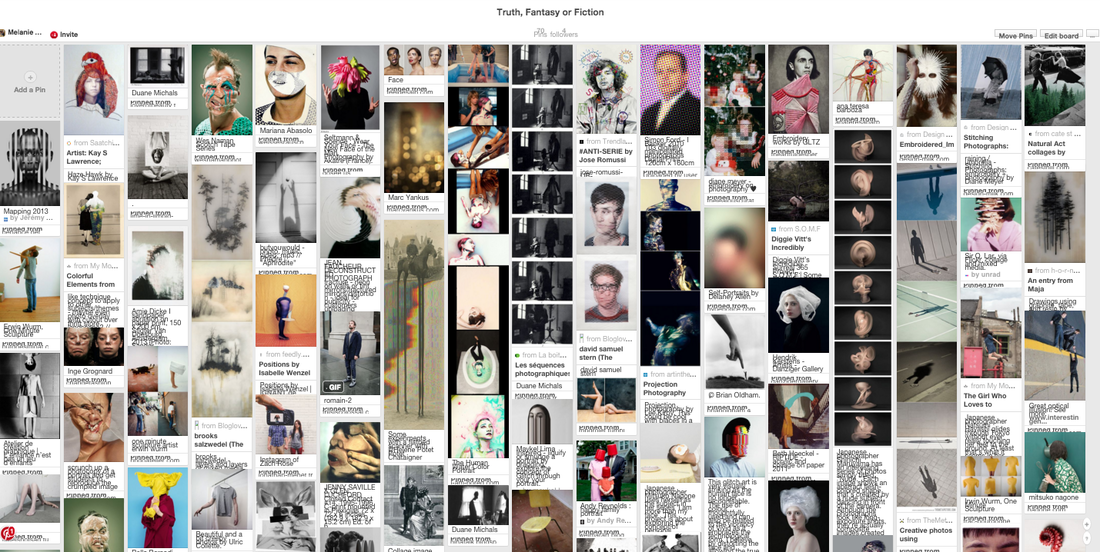
Create an account on Pinterest (https://uk.pinterest.com). This is a brilliant way to search for inspiration. You simply search for different, related themes, photographers or techniques and 'pin' them. Here is the link to Ms Powell's board for the exam theme: Truth, Fantasy or Fiction.
Zoom out, screen shot your collection of images and present on your weebly as an image and embed as a link (you will have to make the 'board' public to do this). We will come back to this once the set tasks are complete. Keep adding to this board over the course of the project. You will see more and more A2 students and teacher boards on Pinterest as the project progresses.
Zoom out, screen shot your collection of images and present on your weebly as an image and embed as a link (you will have to make the 'board' public to do this). We will come back to this once the set tasks are complete. Keep adding to this board over the course of the project. You will see more and more A2 students and teacher boards on Pinterest as the project progresses.
Class Task 1:
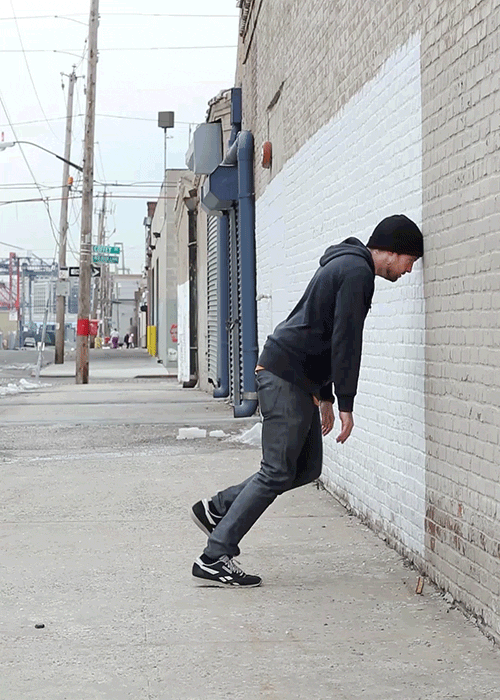
Absurd
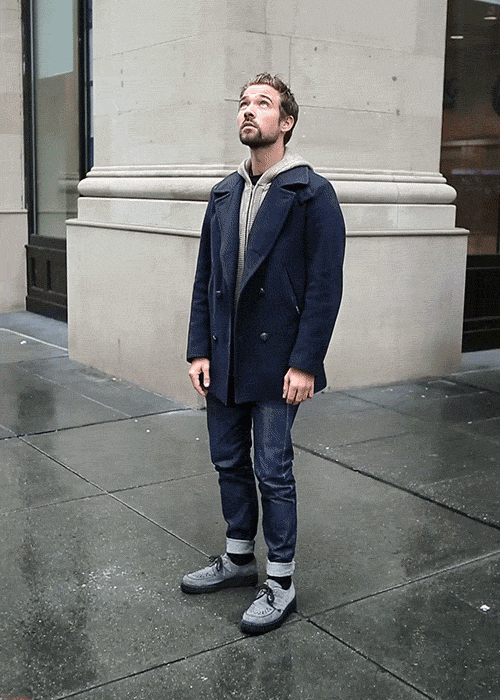
Inspired by Erwin Wurm's 'One Minute Sculptures', use the collection of ordinary-ish objects to create your own interpretations. Watch these clips:
|
Play from 1min 45secs until 2min 45secs
|
|
|
Discuss your initial ideas with the person next to you. Try to draw your ideas (see the drawings by Erwin Wurm on the left). These can be a simple line drawings or even stick men illustrating what you plan.
In small groups attempt the different ideas. Remember- the pose must be held for one minute. Photograph the 'one minute sculpture' whilst in situ from different angles. Give your drawings and notes to another group for them to try and recreate. |
|
On your weebly.....
- Link the intention of the tasks and / or your response to the work of Erwin Wurm and the exam theme (seemingly impossible, transient moments become a reality through capturing them photographically)
- Scan or photograph your notes and drawings. Annotate these- did your initial plans have to change once you began trying out the ideas.
- How did you manage interpreting another group's ideas?
- Subtly edit your images and add to your weebly.
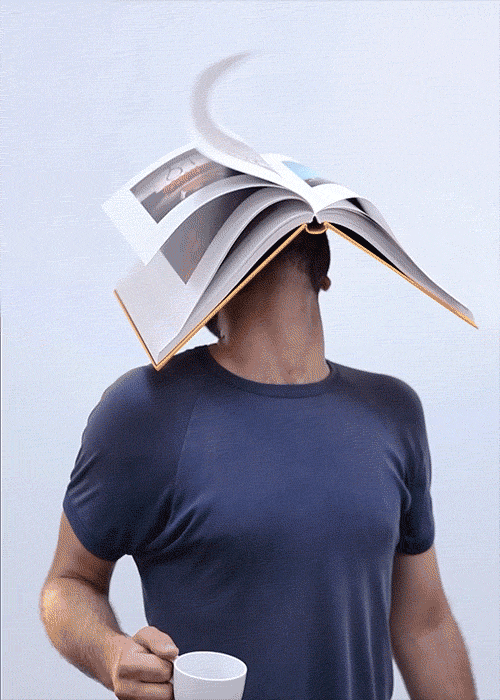
Absurd Extension
Create an absurd Gif like these by Romain Laurent
|
|
|
|
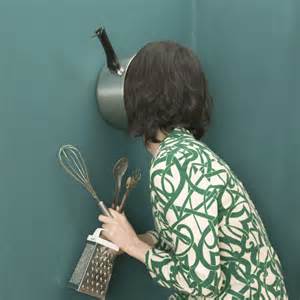
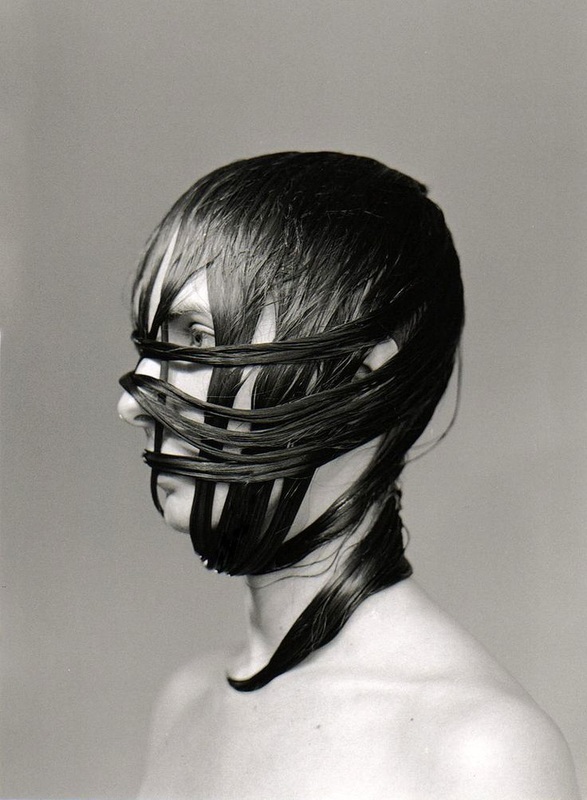
Create a series of images in response to the word 'hide'.
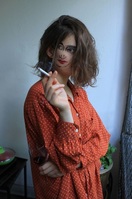
Sebastien Bieniek
|

Thorsten Brinkman
|
Matsuko Nagone
|
Joanna Skrzypczak
|
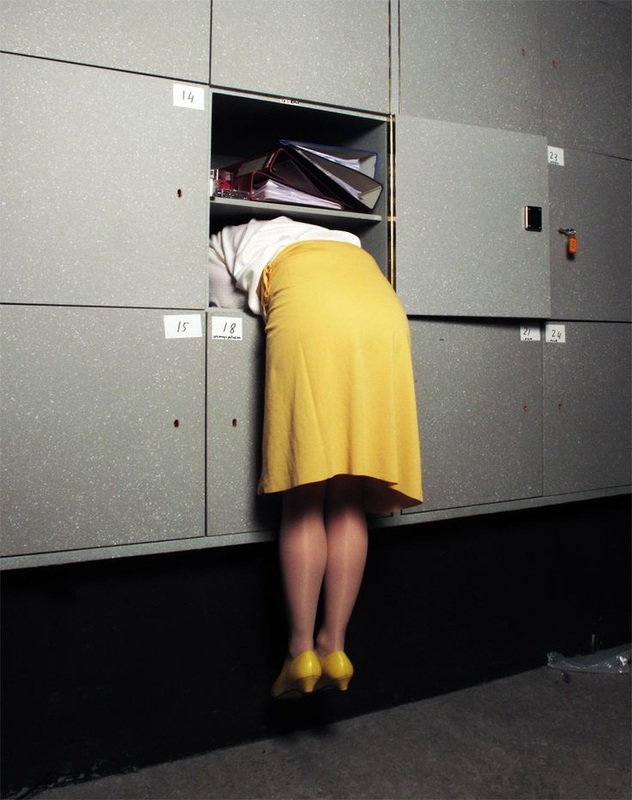
Isabelle Wenzel
|
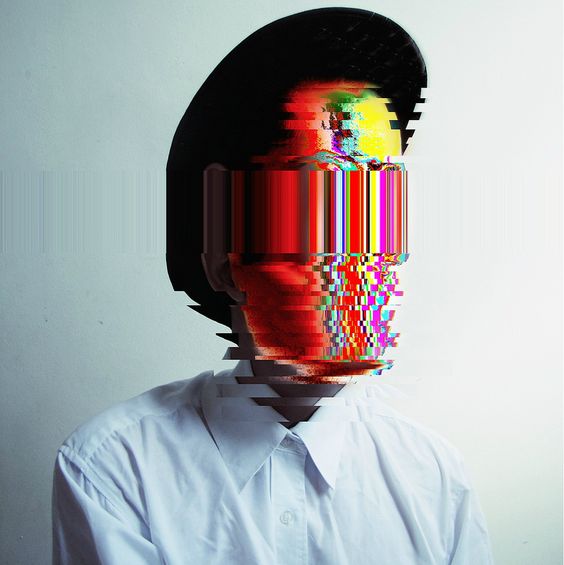
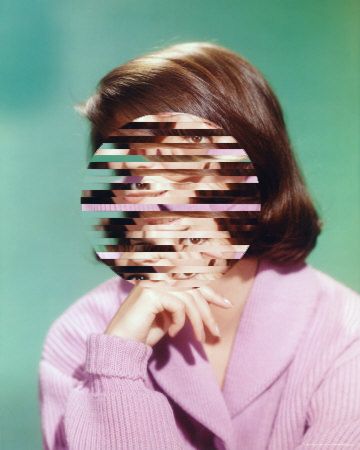
Class Task 2:GlitchGlitch art takes temporary pixelations, interruptions and glitches and turns them into visually arresting pieces, questioning the forms and traditions of art using digital techniques.The idea is that visual artefacts and distortion from data corruption can look even better than the original. Follow the link below to see more examples of Glitch art.
Before you start...
Take a series of portrait images- a 'truthful' representation of your peers. Using the tutorial below take one your images and glitch them altering their reality. |
|
|
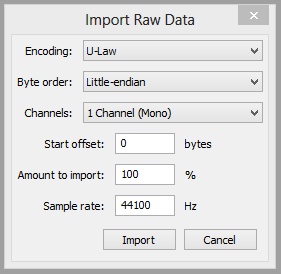
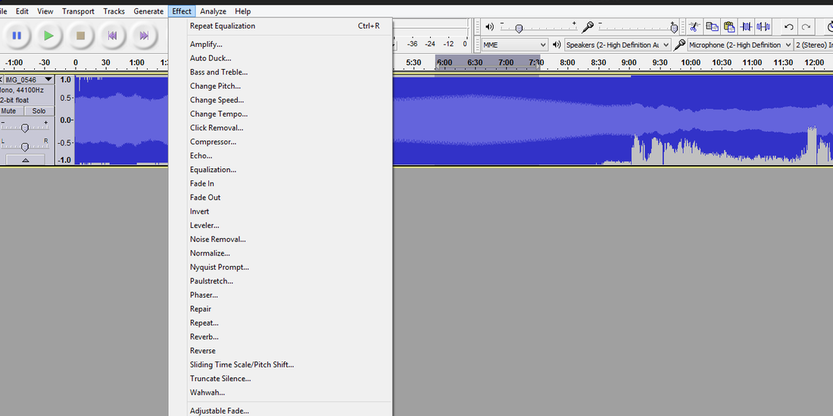
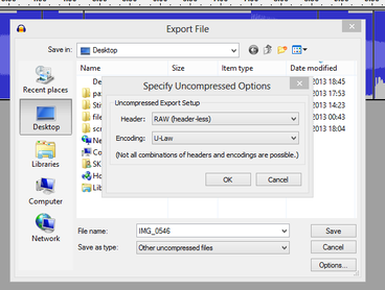
Glitch art method (using audacity)
Preparation: To import the photo into audacity, you need it in a RAW format, I've found TIFF works best, you can save jpegs to tif on photoshop. 1. In audacity, click File > Import > Raw Data, select the photo and then select U-Law or A-Law and import. 2. When the photo is imported, it loads in the track as shown in the image below. To databend or 'glitch' it, select a section of the track, click Effect and then any of the effects. I've only used the recommended effects for databending so far; echo, equalisation, phaser and reverse. All of them will give different effects to the image, and the best databending will use multiple effects in different sections and layer up. 3. When finished with the effects, click File > Export As and then select Other uncompressed files. Then click options and verify you import settings (U-Law), finished! |
|
|
|
On your weebly
- Include the contact sheet for the original portraits. Include at least one, large un-altered image.
- Describe the intention and processes involved during the task.
- Comment on the work you have created bearing in mind the intentions.
- Screen shot the processes you go through to alter your image.
Glitch Extension
Once you feel confident in creating Glitch images explore how you can adapt them or combine them with other techniques so you can have more control over the outcome.
|
|
|
|
Maykel Lima- liquify or smudge a portrait by dragging sections.
|
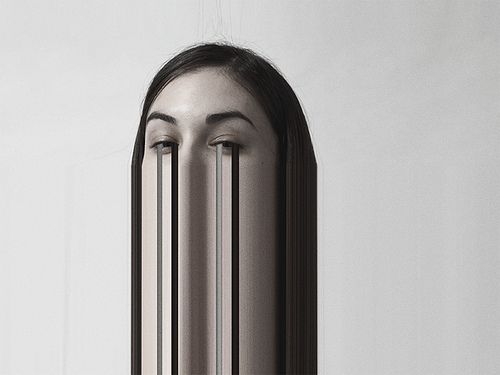
Photoshop part of your glitch image back into the original portrait. (Examples by Heitor Magno and Unrad)
|

Amie Dicke has sanded out all but a handful of parts of the faces and bodies of fashion models, taking the image out of context.
|

Image dragged across a flat bed scanner by Helene Potet Potet Chataigner
|
Class Task 3:
Micro Macro
Part 1: Small Becomes Big...
|
|
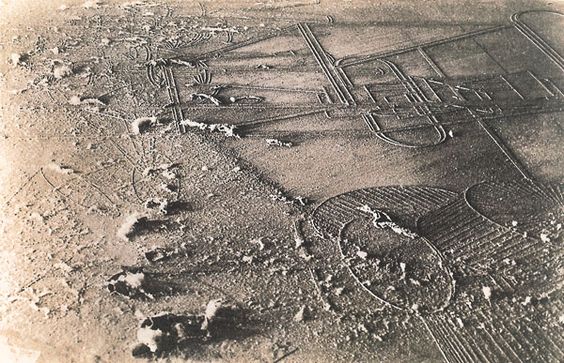
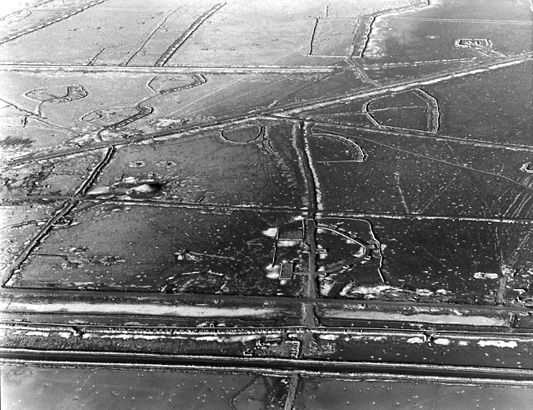
One of Duchamp's close friends and a member of the New York Dada scene, the American photographer and painter Man Ray (1890-1976) was also one of Duchamp's collaborators. His photograph 'Dust Breeding (Duchamp's Large Glass with Dust Motes)' from 1920 is a document of The Large Glass piece by Duchamp after it had collected a year's worth of dust while he was in New York. The photograph was taken with a two-hour-long exposure that beautifully captures the complex texture and diversity of materials that lay atop the glass surface.
THE METROPOLITAN MUSEUM OF ART
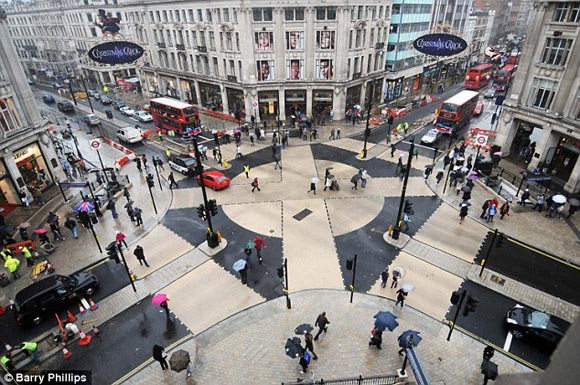
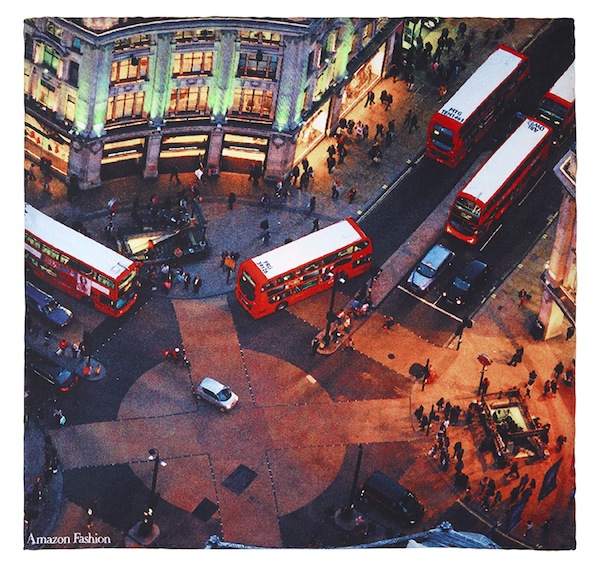
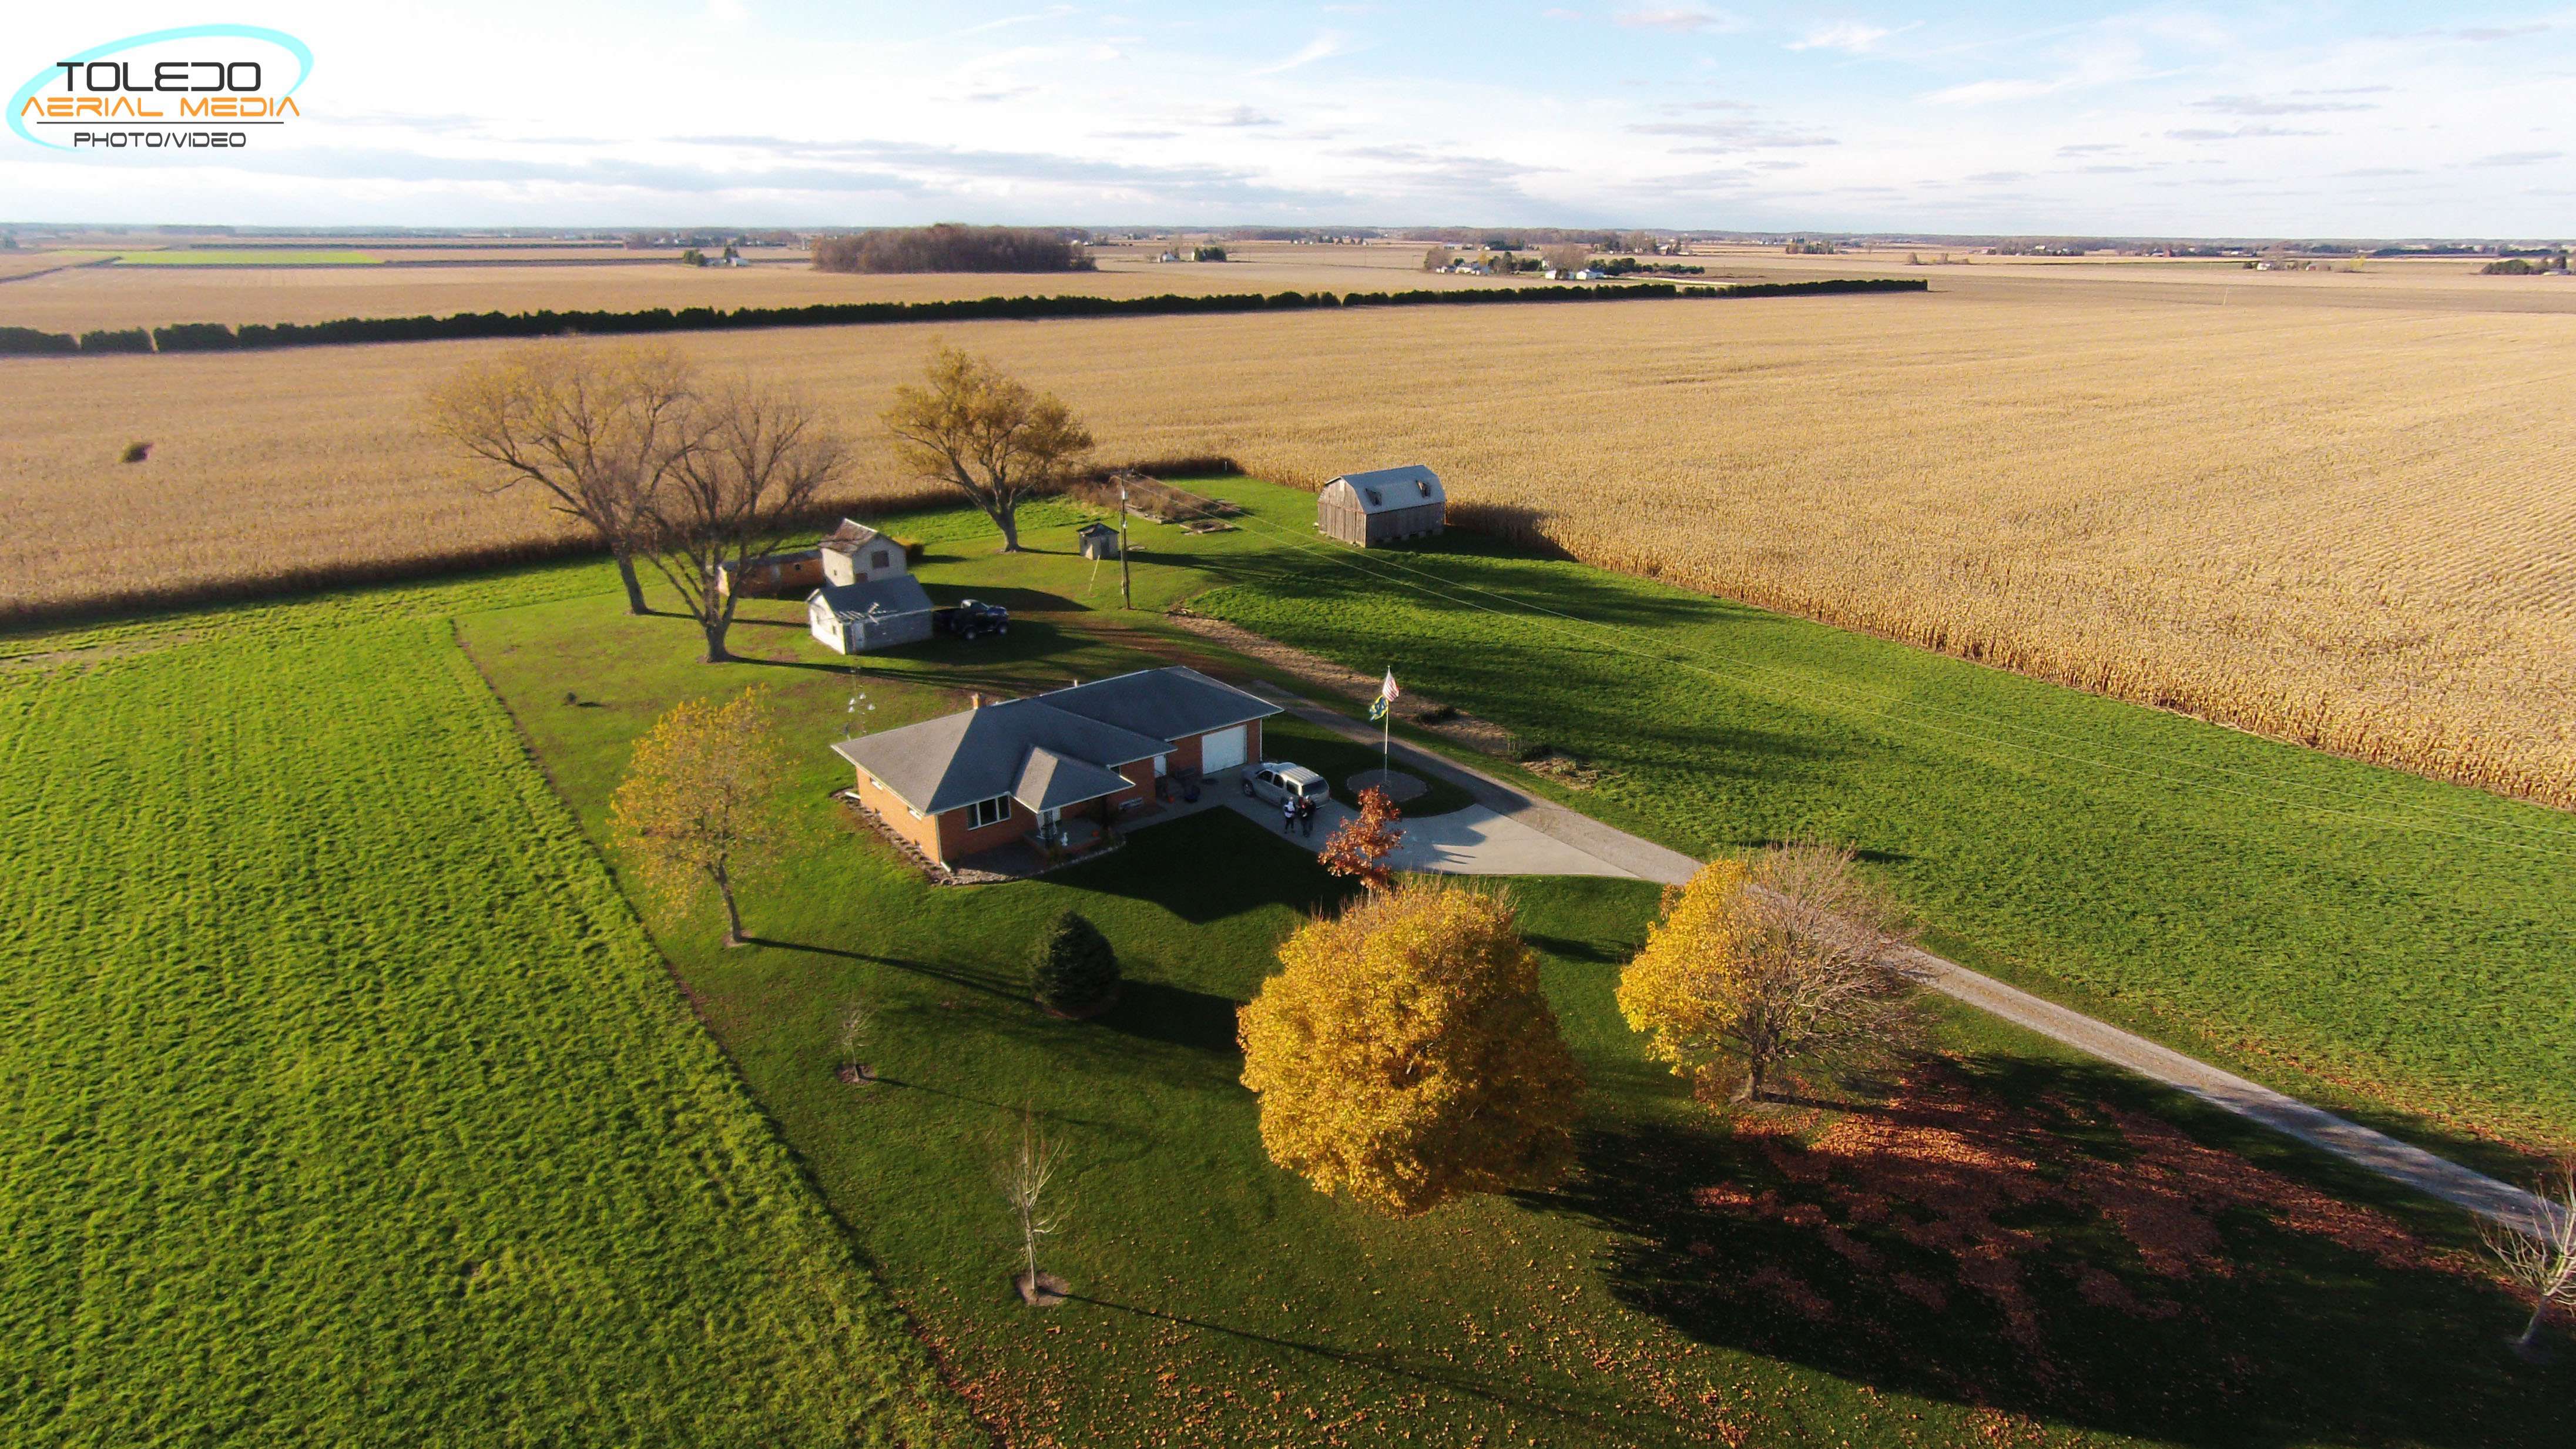
These photographs look like aerial photos of roads and fields.
Look for miniature worlds in your environment. For example:
THE METROPOLITAN MUSEUM OF ART
These photographs look like aerial photos of roads and fields.
Look for miniature worlds in your environment. For example:
- Sometimes moss grows on the mortar between bricks. From the right angle these can look like trees.
- Setting your camera on a low aperture (f2) will create a shallow depth of field. This will help create the illusion that you are looking across an epic view.
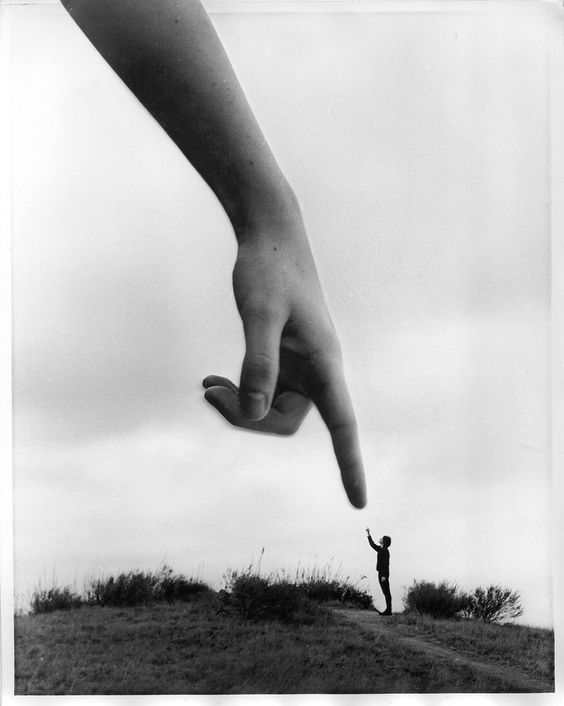
Part 2: Big Becomes Small
|
Tilt-shift photography is a technique that makes real objects appear small, as if they were part of a miniature scale model.
|
|
|
|
Experiment with these images if your own photographs do not allow you to achieve the right results.
| ||||||||
On your weebly
- Outline the intentions of the task linking it to the theme.
- Include a contact for each parts of the task
- Edit the macro shots- screen grab the changes you make
- Experiment with the tilt shift process- screen grab the different steps to upload to your weebly
Micro Macro Extension
Build a small world. Photographer such as Tatsuya Tanaka and Slinkachu use small, model people, usually used in railway model making, to create humorous tableau.
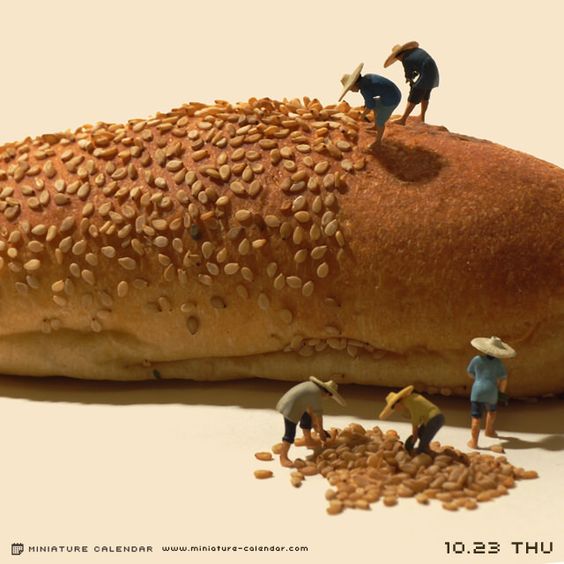
Tatsuya Tanaka
|
Slinkachu
|
Slinkachu
|
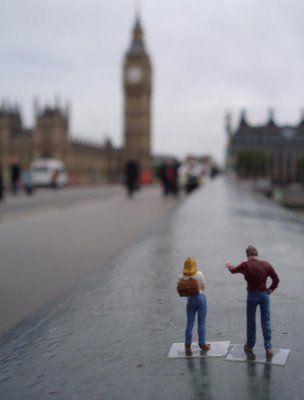
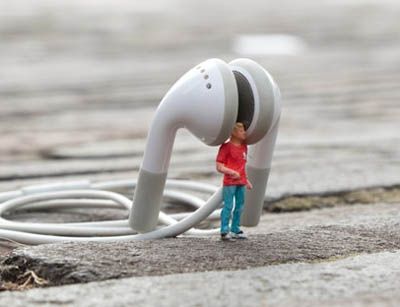
Create illusions of scale by exploiting the distance between objects.

|
Brian Oldham
|
Half Term Homework
1. Gallery visit
You must also visit an exhibition. You may already be having thoughts about the personal way you plan to interpret the theme. Try to find a relevant exhibition. If you don't have a clue where to begin in terms of responding to the exam title then try to visit a breadth of photography. Use these links to help you find an appropriate show.
Document your gallery visit on your weebly. Discuss the context, techniques and intentions of the photographers. Include images that support your comments and discuss the curatorship, sense of audience or exhibition reviews as appropriate.
2. Unposed truth
Paul Graham and Garry Winogrand, demonstrate a need to document ‘real’ situations. In their series Beyond Caring and Women are Beautiful respectively, they take photographs secretly in order to capture a truthful account.
Paul Graham
|
Of all the discordant visions of Britain produced during the 1980’s by its new generation of photographers, the most unerringly true to its subject matter, the most consistently discomforting, and the most powerfully enduring is Paul Graham’s ‘Beyond Caring’.
The 1980’s were a time of considerable unemployment. In 1982, UK unemployment levels reached more than three million. This meant that one in every eight people in Britain was out of work. The jobless during the 1980’s were not those with means or wealth. The main victims were those who worked in the traditional manufacturing industries that had initially given Britain its means to prosperity. These tended to be working class people with few employment prospects outside their learned trade. With each mine closure or factory closure, entire villages and communities were instantly made redundant. By 1982, the dominant mood had turned from anger to being one of resentful acceptance. It is into this resigned sociocultural context that Graham’s Beyond Caring is placed. Paul Graham didn’t get official permission to take photographs in unemployment offices, so he went in anyway, with a camera at hip level or placed on a bench or chair. |
|
Garry Winogrand
|
|
|
Garry Winogrand photographed in crowds and on the street from his early days as a New York magazine freelancer in the 1950s to his last years in Los Angeles. When he sensed the composition of a picture falling into place, Winogrand would quickly raise his camera to his eye and take candid photos of anonymous people. He used a 35mm Leica camera that enabled him to photograph quickly and freely. Often he focused on women—in parks, getting into cars, at parties, exiting stores—creating photographs that highlighted the changing role of women and, at times, the uncertainty of their new place.
Task
Explore taking a photograph covertly. For example, shoot from the hip, place your camera next to you on a bench / table or quickly take the photograph in the usual way when you see the perfect moment. either way, it's important that your subject is unaware of your presence.
On your weebly
- Outline the intentions of the task linking it to the theme.
- Include a contact sheet, selects and edits.
|
3. Unposed Extension
Sophie Calle began her artistic life when, after returning to her native Paris, she fell into an isolated and lonely existence. Desperately seeking some sort of comfort, she began to follow people around the city. For Calle, “Establishing rules and following them is restful. If you follow someone, you don’t have to wonder where you’re going to eat. They take you to their restaurant. The choice is made for you.” Her work is a natural extension of this odd philosophy, and she demonstrates an alarming expertise in voyeurism. |
|
4. Enter these Photographs into a competition!!
Click here for an exciting Photography competition where you could win private view tickets for the Barbican exhibition, ‘Strange and Familiar: Britain as Revealed by International Photographers’ and exhibition catalogues signed by Parr.
Tate Modern- Performing for the Camera
|
|
|
Document your visit to the Tate Modern. This should include:
Click here for the Artsnet review.
- An overview of the theme.
- How the exhibition has been curated.
- A discussion of three works / photographers in depth.
- Links to the exam theme (you can refer to other works you haven't already discussed here)
- Your opinion.
Click here for the Artsnet review.
What's next...?
Once you have completed all the set tasks you need to consider three starting points for your own response to the theme. Each idea must be supported by a link to a photographer and your own images. Look through the power point, the exam paper and also the links below to help you. Having said this, you can choose to build on any of the processes and themes visited during the set tasks above.
|
Some of the links may not work in the website. Click on the buttons below to access them.
|
Helpful Links...
Project Expectations
Ensure that you have satisfied the following Assessment Objectives tasks by the end of the project:
AO1 - DEVELOP
Make sure all set tasks are completed. By the end of the project, we would like you to have analysed three images by photographers relevant to your ideas using the Form, Process, Content structure we have followed before. Use your research to inform your development. A good response does not mean an exact copy.
AO2 - EXPERIMENT
In order to show a good range of experimentation, start by taking 3 sets of different observations in response to 3 ideas based on your research. It is important to show refinement of ideas and techniques throughout the project. Make sure annotation considers subject, concept, approach, technique, formal elements etc as appropriate. You MUST include your contact sheets for each set, selects and edits.
AO3 - RECORD
We expect to see a minimum of 8 sets of observations / recordings over the duration of the project. Remember that we are looking for a good technical and compositional understanding in your work, along with a clear explanation of ideas. This is where you can gain marks for technical control so remember to consider composition, white balance, depth of field, exposure etc whilst taking your photographs and during post-production editing.
AO4 - REALISE
Develop and refine your best ideas further working towards an exhibition outcome, which will be completed during your examination period (12 hours) at the beginning of the Summer Term.
