Foundation
The Foundation unit is made up of a series of tutorials and set tasks that will help you understand how to use your digital camera and and SLR camera, covering the basic principles of photography. You will also be learning to develop your 'photographic eye' and improve your compositional understanding, before moving onto your first independent project.
The course also involves along learning how to research and analyse photos to develop a critical and contextual (C&C) understanding and appreciation of the different genres within the history of photography.
Below you will find a series of presentations and workshop tasks with links and tips to support you with your independent assignments. Please check with your photography tutor for deadlines, although main project deadlines are visible on our department calendar.
Project 1 - Photograms
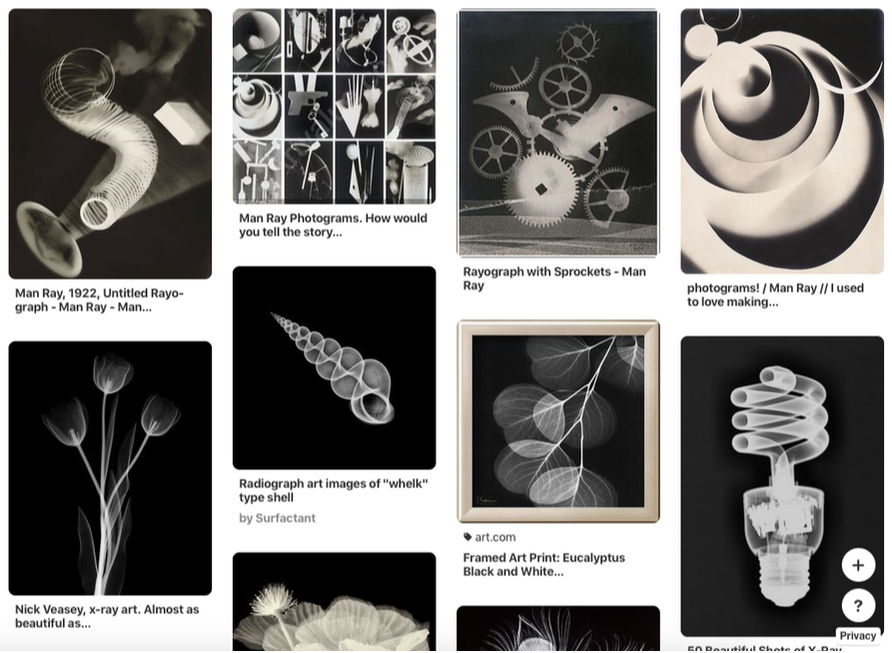
Pictures without negatives
'A photogram is a photographic image made without a camera by placing objects directly onto the surface of a photo-sensitive material such as photographic paper and then exposing it to light. The result is a negative shadow image varying in tone, depending on the transparency of the objects used. Areas of the paper that have received no light appear white; those exposed through transparent or semi-transparent objects appear grey.'
Photogram Prints
Start off by collecting a number of different objects that are transparent, translucent and with interesting shapes and structures i.e. glass, plastic, water, wire, prisms, beads, grains, card, cling film, food, plants, feathers, fabric, paper, newspaper, tracing paper, etc..
Make 3 test strips that show different apertures
5 secs at f2.4 , f5.6 , f16
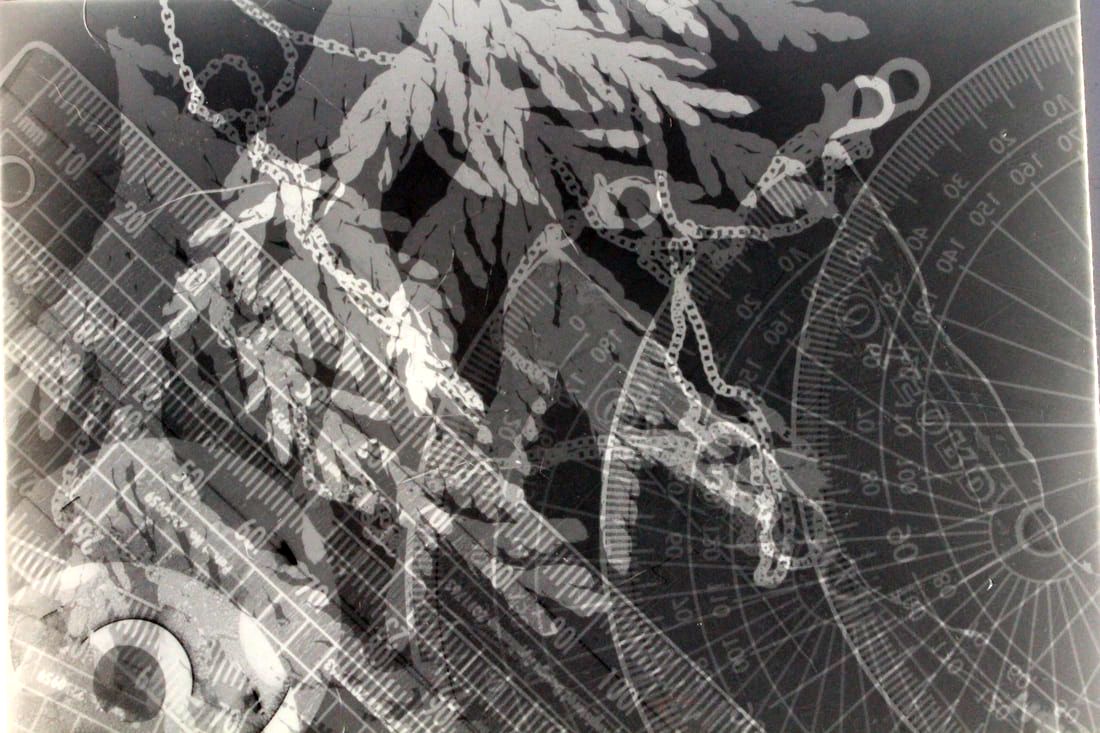
Using your objects, create at least 6 experimental 5’x 4’ prints involving the following processes:
Double exposure/movement,
stencilling,
positive sandwich print,
painting with developer,
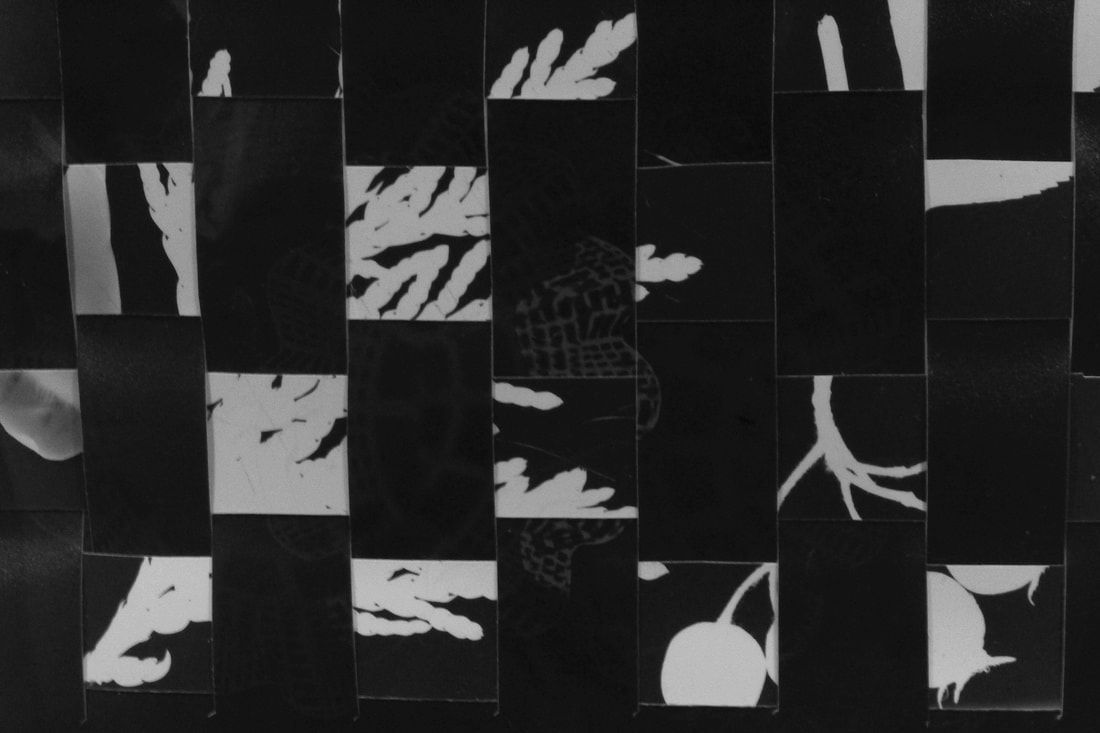
weaving,
toning and solarisation.
Make 3 test strips that show different apertures
5 secs at f2.4 , f5.6 , f16
Using your objects, create at least 6 experimental 5’x 4’ prints involving the following processes:
Double exposure/movement,
stencilling,
positive sandwich print,
painting with developer,
weaving,
toning and solarisation.
|

|
|
2) Select your best six images that represent the different experiments and window mount each image on the mount board given. Your final selection of images should work together as a whole and demonstrate experimentation and an understanding of composition. Please see the mounting photography page for help
3) Present the above experiments on your weebly (follow the guide below).
3) Present the above experiments on your weebly (follow the guide below).
Project 2 - The Pin Hole Camera
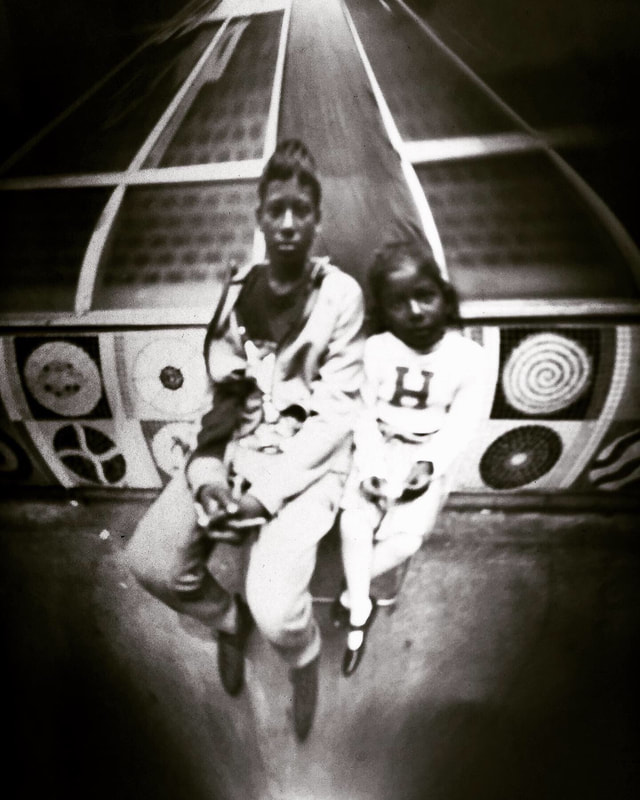
The pin hole camera is probably the simplest camera you can imagine and is based on the camera obscura, which is a large room or container that has been blacken out except for a small hole of light.
Fig.1 illustrates this principle, where you can see you that light passes through a simple hole (which we can call an 'aperture') in straight lines to become laterally inverted.
This can be achieved simply in any room with a window that is blacked out except for a small hole in front of the window. The results might look something like Fig.2 if you are lucky. Watch the BBC documentary video for further information and an interesting introduction to the camera obscura.
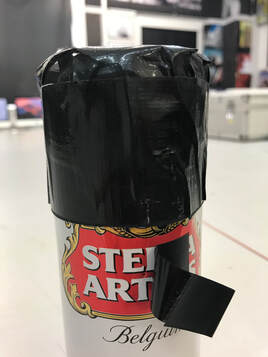 |
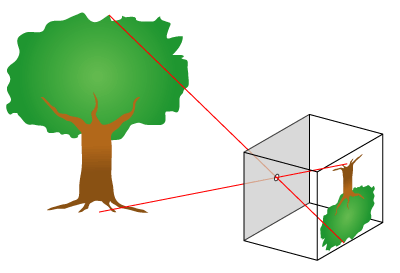 Fig.1 |
|
|
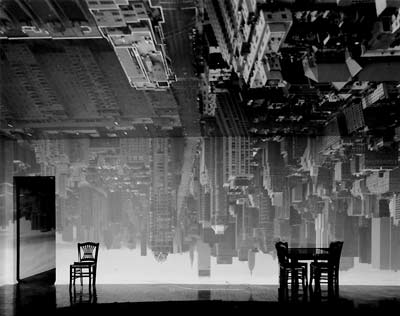 Fig.2 |
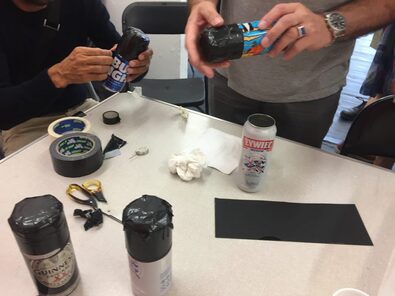
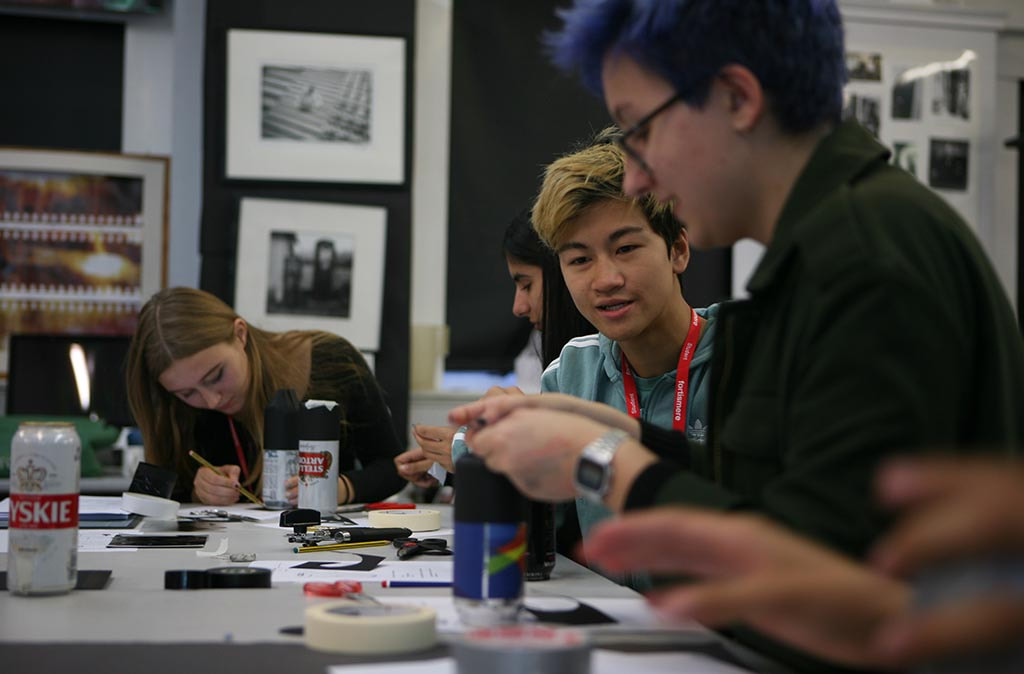
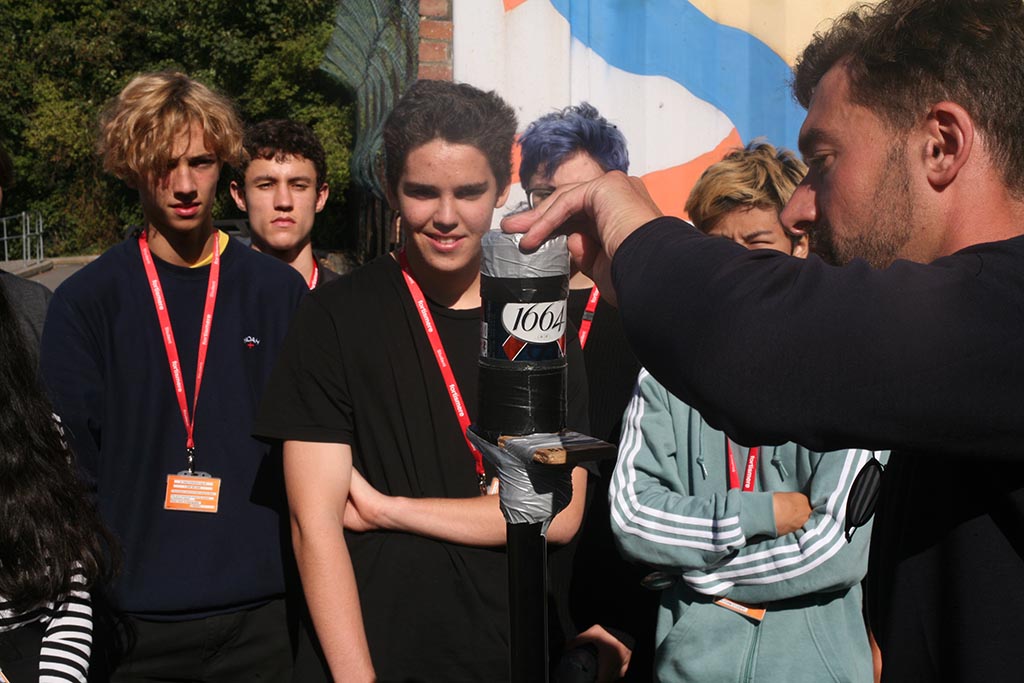
Making the pinhole camera
In class you will be making a Pinhole Camera which you can use to capture a fixed image by using the darkroom to develop photographic paper. Therefore, you will need to make sure you have the following:
- A beer can & lid
- A roll of tin foil
- Black gaffer/duct tape
- Black card to line the inside if reflective
|
|
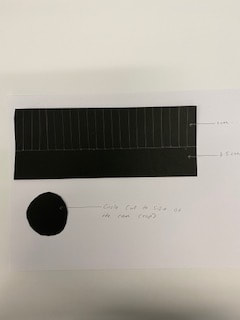
Measure out a piece of card and cut strips into the top. Also measure out a circle the size of the can lid
|
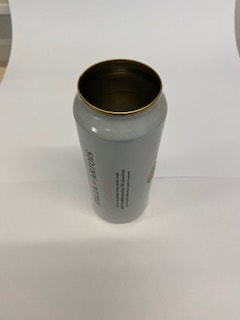
Using a can opener take off the lid of the beer can
|
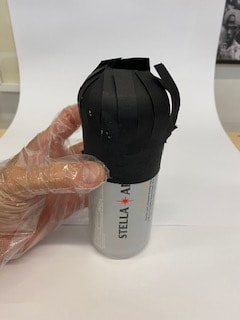
Wrap the card around the beer can
|
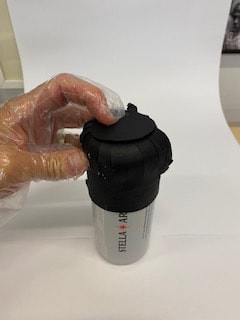
Place the circle on top and then tape the lid with gaffer tape
|

Make a small hole in the front of the can
|

Cover the hole with electrical tape
|
|
|
Pin Hole Photographs
Task 1
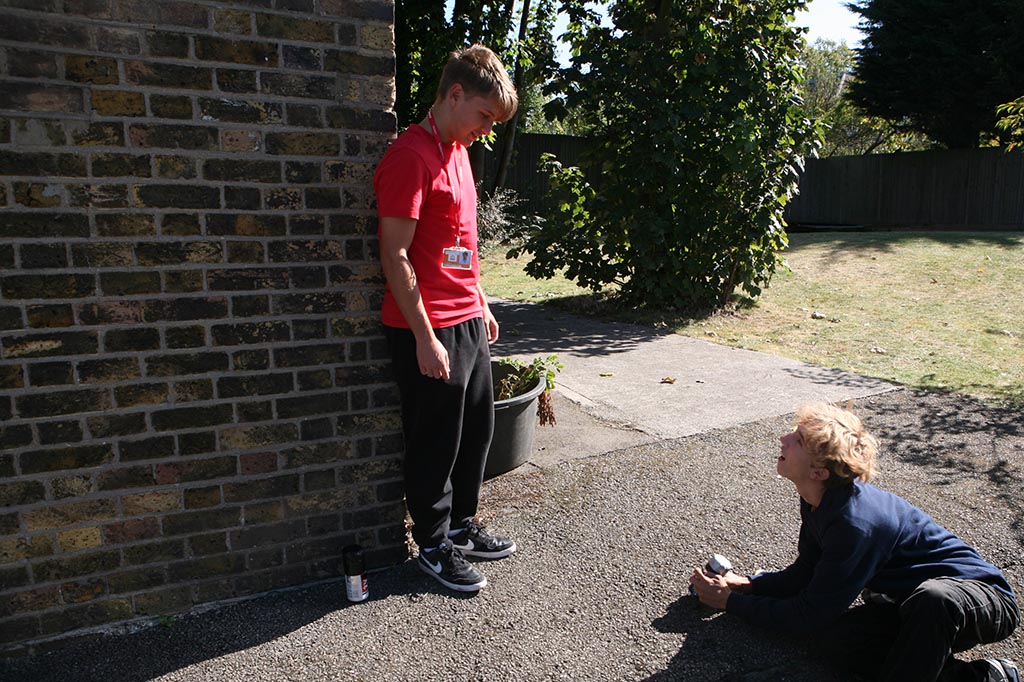
Having created your pinhole camera, we would like you to try and capture three shots from different points of view:
Task 2
With your shots, make sandwich prints to get a positive print.
Task 3
Window mount your three positive prints and then create a section on your weebly that shows your work. Along side your images create a section on the work of Ben Nathan that you can link your visual practise to. Displays at least three examples of their work along with full analysis
Having created your pinhole camera, we would like you to try and capture three shots from different points of view:
- From a window looking outwards
- Outdoors and at the corner of a building
- Involving a person (stand still!)
- Double exposure portrait
Task 2
With your shots, make sandwich prints to get a positive print.
Task 3
Window mount your three positive prints and then create a section on your weebly that shows your work. Along side your images create a section on the work of Ben Nathan that you can link your visual practise to. Displays at least three examples of their work along with full analysis
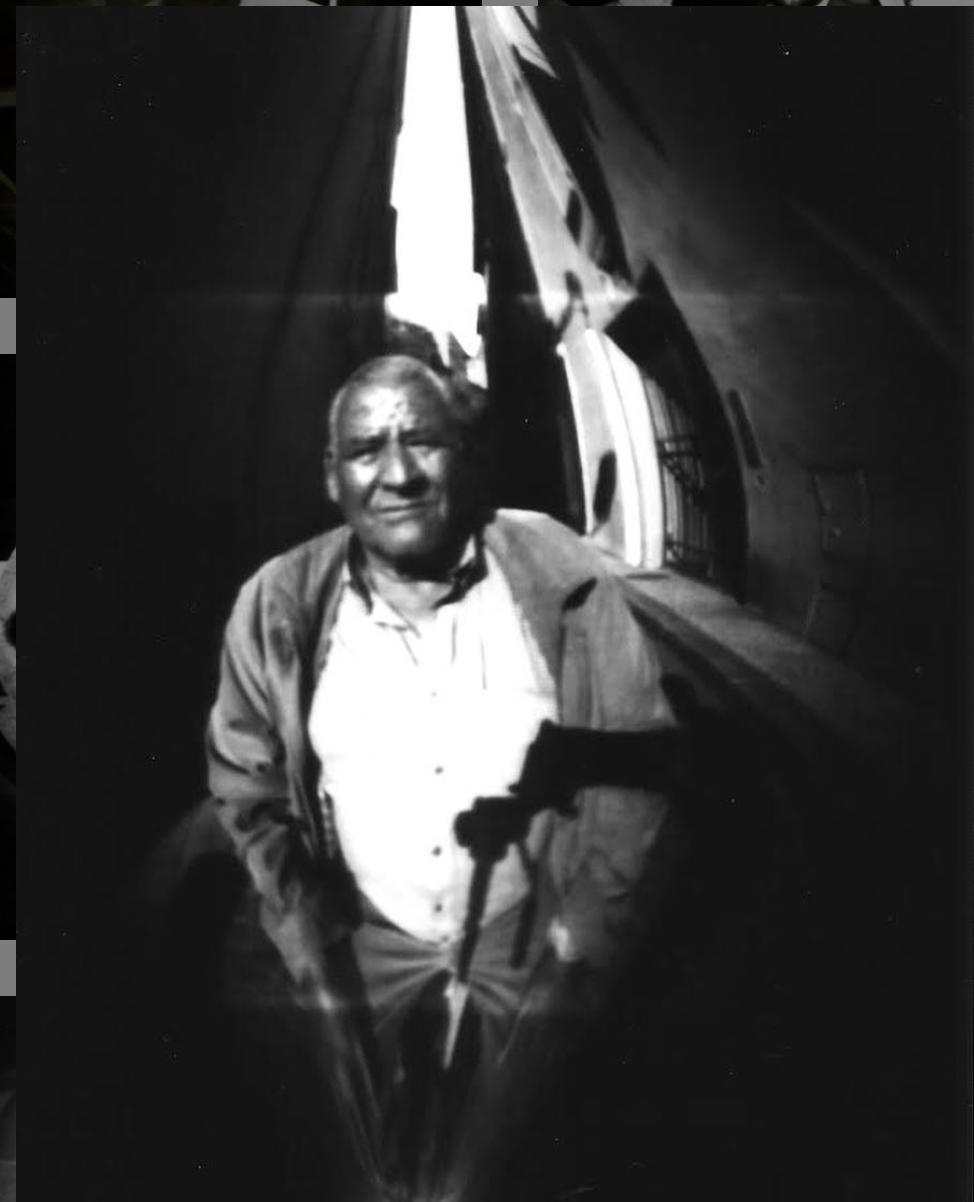
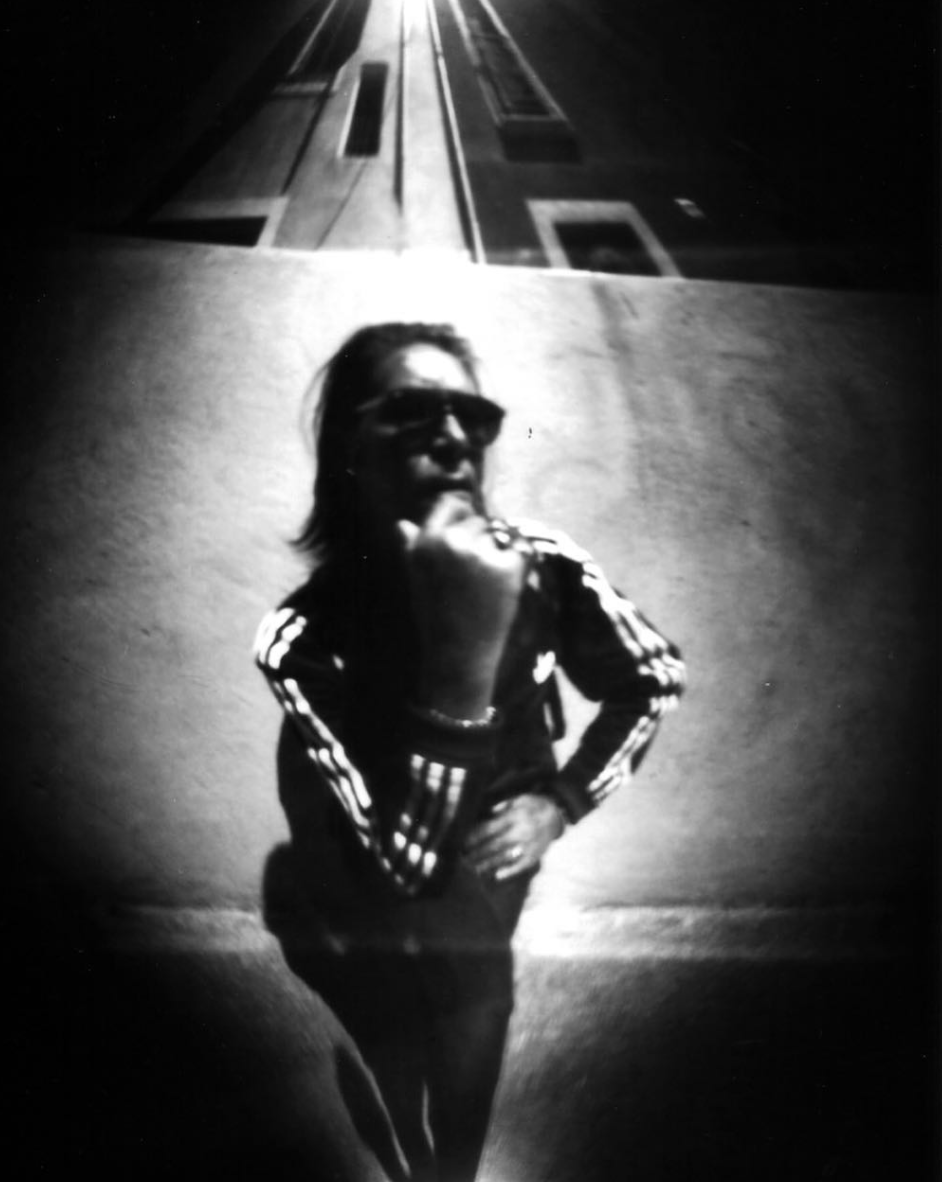
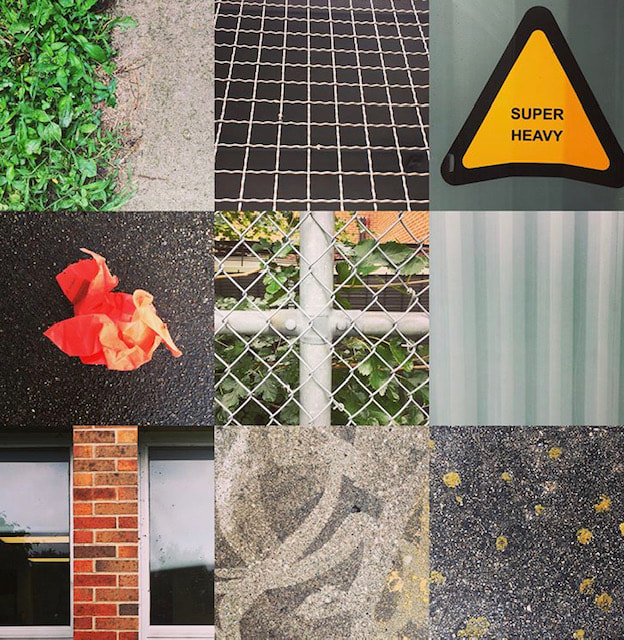
Ben Nathan - STÉNOPÉ
Ben Nathan works across different media, from painting and photography to film and sculpture. His artistic skills reflects on the functionality of the city and its industry and documenting urban change. His explorations into infrastructure and photography questions the changing nature of our cities environment and access to public or private space. His work is displayed below. .
Ben Nathan works across different media, from painting and photography to film and sculpture. His artistic skills reflects on the functionality of the city and its industry and documenting urban change. His explorations into infrastructure and photography questions the changing nature of our cities environment and access to public or private space. His work is displayed below. .
|
|
|
Technical - Mounting of final sandwich prints
Project 3 - The Film Camera
All cameras control the amount of light entering the camera. A pinhole camera is the most basic form of camera allowing light to enter through a single hole and hit light-sensitive paper. The same is true for a manual SLR camera, except the light has to pass through a lens, which sharpens the image and controls the intensity of light through a control known as the 'aperture'. The light is allowed to hit the film for a period of time, which is controlled by a shutter mechanism.
Please visit our page 'Film Photography' for a complete guide to using a film camera.
You can also learn about key darkroom techniques by visiting our page 'Darkroom Processes'.
Please visit our page 'Film Photography' for a complete guide to using a film camera.
You can also learn about key darkroom techniques by visiting our page 'Darkroom Processes'.

My First Film
A) Working in pairs and using a 36 exposure roll of film with an ISO of 400, complete the following:
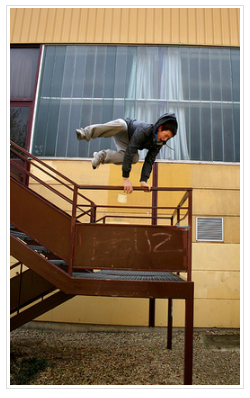
This time you will be trying to capture a moving scene against a simple background. This time you will keep the Aperture fixed i.e.
Aperture Setting = f8 Speed = 1/500 sec to 1 sec B) Find a simple background wall and ask a friend to jump. Take three shots of your friend jumping using the following shutter speeds: 1 second (1") 1/125 second 1/500 second Experiment with capturing different types of movement using a range of speeds i.e. body in motion, vehicles, birds, etc.. Note: For each experiment, keep the angle and pose the same so that the only variable is the speed. This way you can make a better assessment of the impact of changing the speed. |
|
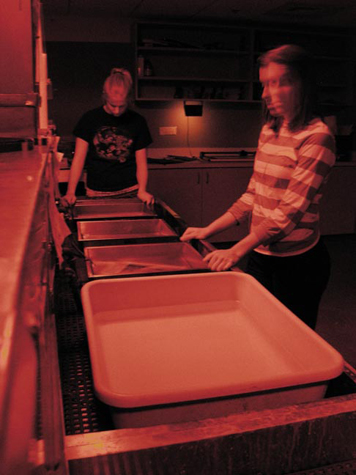
Processing & Printing
|
Your teacher will demonstrate how to process your film, although please revise by visting our page 'Darkroom Processes.'
a) Contact Sheet Having processes and archived your film in plastic archival sleeves (5 exposures wide), you should now create a contact sheet (one per student): 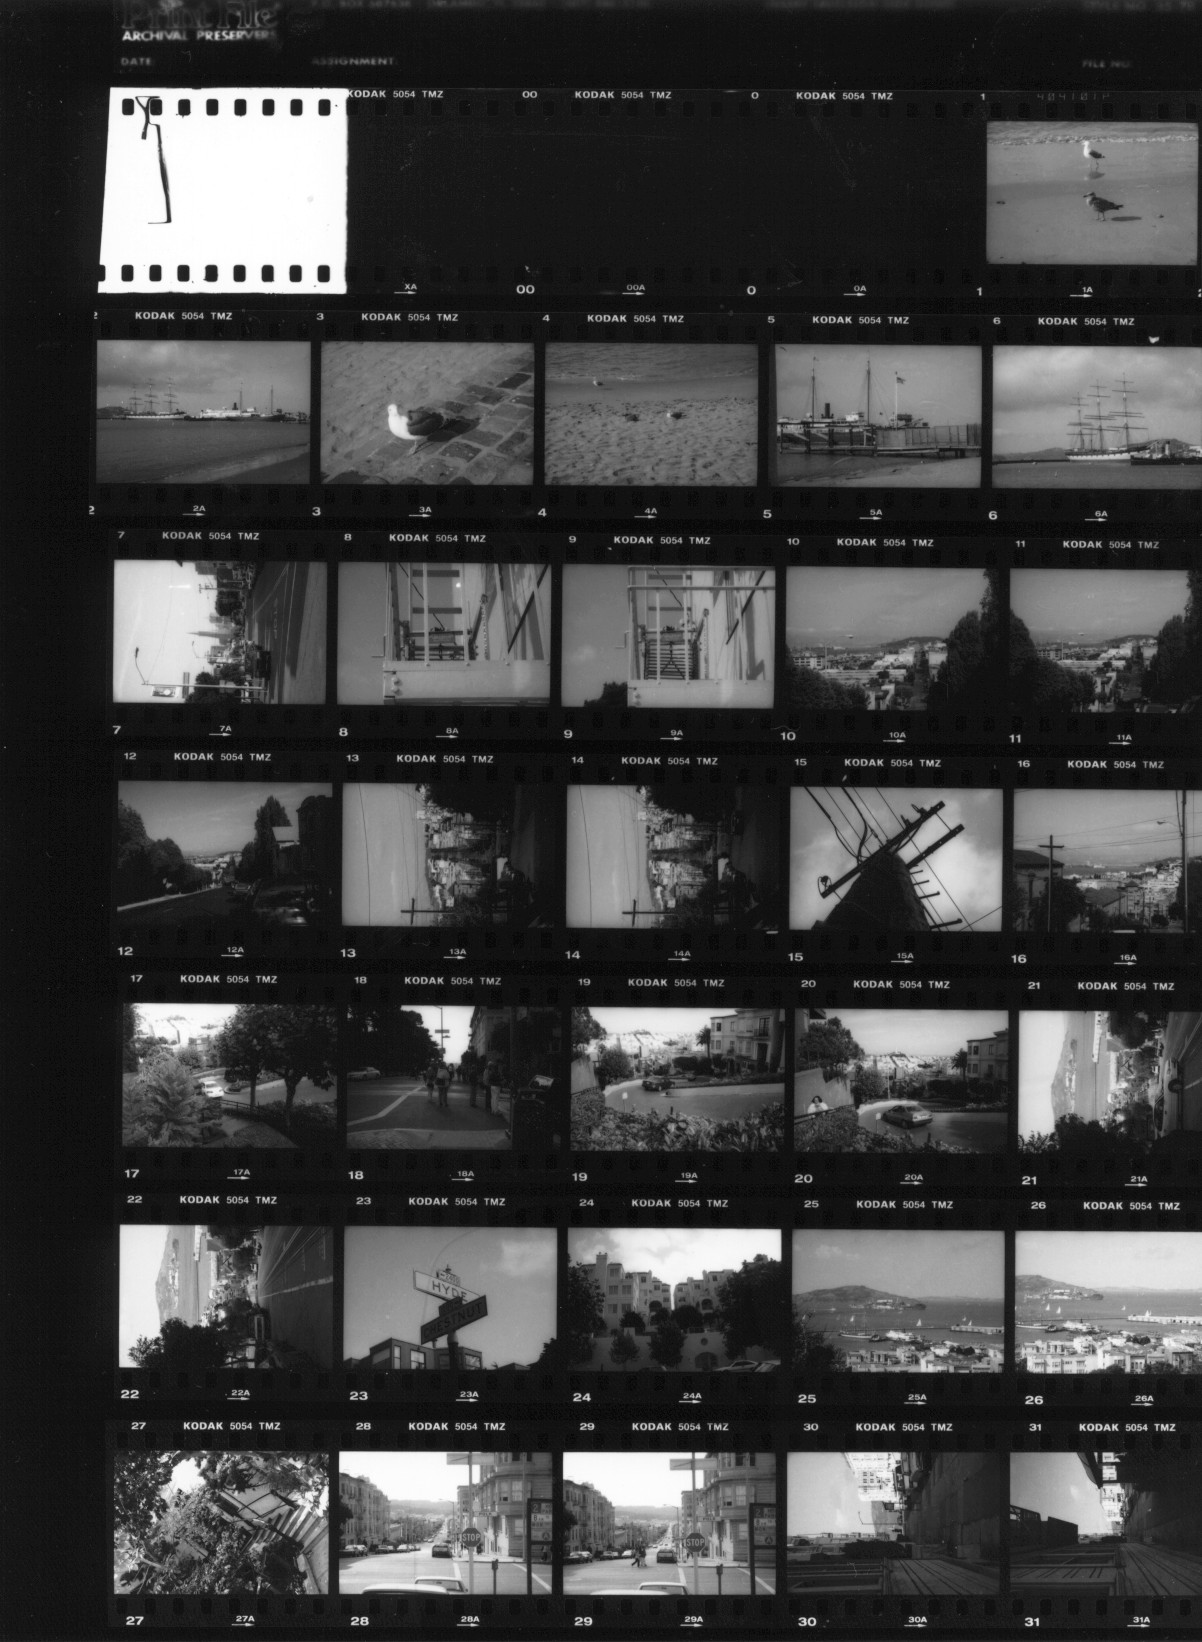 A Contact Sheet b) Test Prints
Choose 3 photos from your first film to make some 5'x4" prints. Remember to use test strips to determine the correct time before doing the final print. |
 |
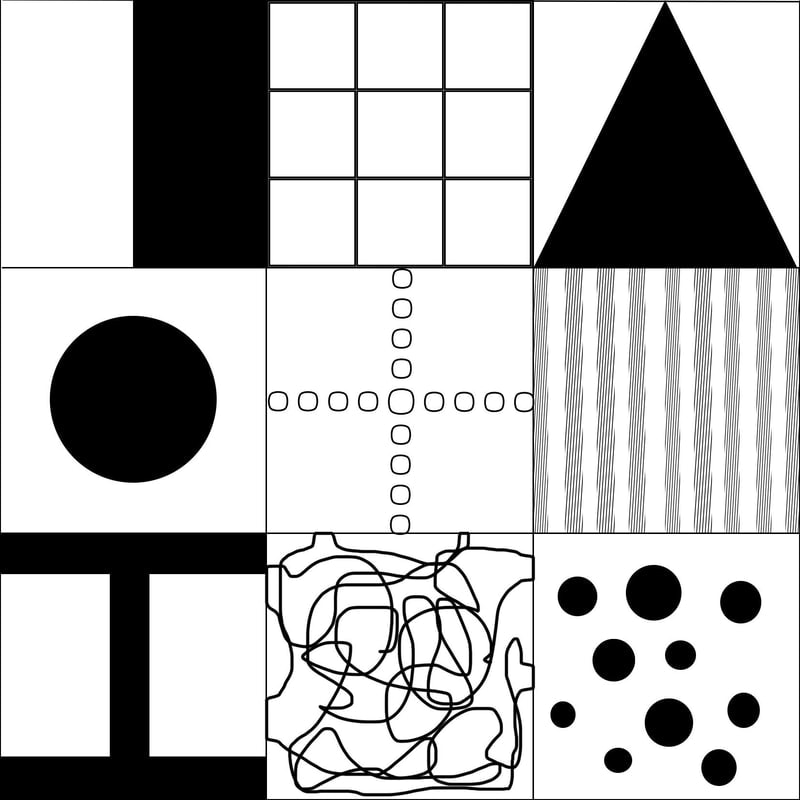
Composition The term composition means 'putting together' and can apply to any work of art, from music to writing to photography. Composition, at its most basic, is how you place your subject (and everything else) in your view finder.
Before you begin taking photographs we are keen that you become more aware about the composition of you images.
Objective
To develop understanding of composing an image in the viewfinder.
Outcome
Identify different compositions and photograph them.
Task 1
With your camera settings on automatic, find examples of the nine different compositions on the handout. Carefully arrange your composition in your viewfinder before taking the photo.
|
|
The Formal Elements in photographyThe formal elements in photography are slightly different to those they may have encountered in art and design. There is no definitive list but this is the one I tend to use:
Focus: Which areas appear clearest or sharpest in the photograph? Which do not?
Light: Which areas of the photograph are brightest? Are there any shadows? Does the photograph allow you to guess the time of day? Is the light natural or artificial? Harsh or soft? Reflected or direct?
Line: Are there objects in the photograph that act as lines? Are they straight, curvy, thin, thick? Do the lines create direction in the photograph? Do they outline? Do the lines show movement or energy?
Repetition: Are there any objects, shapes or lines which repeat and create a pattern?
Shape: Do you see geometric (straight edged) or organic (curvy) shapes? Which are they?
Form: How are three dimensional objects represented? Do they appear flattened? Do they cast a shadow? How do they relate to the space in the image?
Space: Is there depth to the photograph or does it seem shallow? What creates this appearance? Are there important negative (empty) spaces in addition to positive (solid) spaces? Is there depth created by spatial illusions i.e. perspective?
Texture: If you could touch the surface of the photograph how would it feel? How do the objects in the picture look like they would feel?
Tone (Value): Is there a range of tones from dark to light? Where is the darkest value? Where is the lightest?
WHAT IS A PORTRAIT?
'A painting, drawing, photograph, or engraving of a person, especially one depicting only the face or head and shoulders.'
Oxford English Dictionary
'Portraiture is a very old art form going back at least to ancient Egypt, where it flourished from about 5,000 years ago. Before the invention of photography a painted, sculpted, or drawn portrait was the only way to record the appearance of someone. But portraits have always been more than just a record. They have been used to show the power, importance, virtue, beauty, wealth, taste, learning or other qualities of the sitter.'Tate
'A portrait is an evocation of a person. It gives the sense of that person. It doesn’t necessarily need to look like the person but it would have to give some impression.'
Lesley Stevenson, Senior Paintings Conservator at the Scottish National Gallery
'I think a portrait is probably different things to different people but in general terms it’s a depiction of a person which can be idealised to flatter them or it can be an impression of their personality or it can even be an abstract depiction of some element about them.'
David Taylor, Senior Curator, Scottish National Portrait Gallery
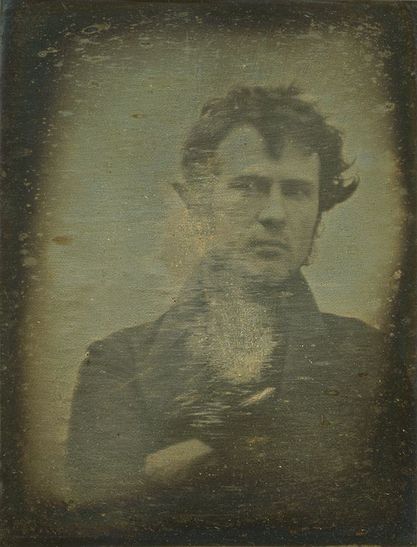
THE SELFIEThe current obsession with photographic self-portraits - The Selfie - can be traced back to the origins of photography. One of the first things photographers did when they learned how to fix light on a surface was to turn their rudimentary cameras on themselves. The earliest known example comes from 1839, the same year that Louis Daguerre patented the 'invention' of photography as a commercially viable process. Since then, the self-portrait, a genre inherited from painting, has become a staple form of photographic image making.
Robert Cornelius’ Self-Portrait: The First Ever “Selfie” (1839)
Robert Cornelius’ Self-Portrait: The First Ever “Selfie” (1839)
What is a Selfie?
Selfie is slang for Self-Portrait. It is used today to infer a photographic self-portrait taken on a mobile device and shared via social media. In 2013, "Selfie" was word of the year in the Oxford English Dictionary. The inclusion of front facing cameras on smart phones and the popularity of social media sites like Instagram and Snapchat have made the posting of Selfies increasingly popular as a form of photographic self-expression.
The Selfie accounts for a large proportion of the digital photographs people make. According to a recent survey, 24 billion selfies were uploaded to the Internet last year (2016).
Some initial questions:
- How many Selfies do you take a week? What do you do with them? If you don't take Selfies, why not?
- What, do you think, is the reason why taking Selfies has become so popular? Is there a downside to the taking and sharing of Selfies?
- What are the rules or conventions for taking a Selfie? Where do these come from? Is it OK to break these rules?
TASK
The following experiments are designed to encourage you to get to know some famous examples of self-portraits in art and photography and to use them to help you create your own examples. Look at the three different experiments below and create different selfies in the style of the artists shown. Create a tab on your weebly entitled selfies and upload your selfies to the page.
Selfie Experiment #1: The Reflected Selfie
Once you've had a look at some examples, experiment with your own Reflected Selfies*. Try using a range of reflective surfaces (not just mirrors). What happens when you choose a shop window, curved surfaces or a sequence of mirrors, for example? Will you look straight into the reflective surface or to one side? Will you include your phone/camera or hold it out of the way?
Florence Henri - Self Portrait
|
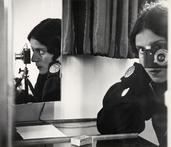
llse Bing - Selff Portrait
|
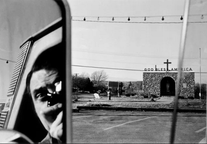
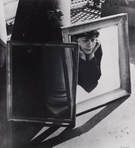
Lee Friedlander - Self Portrait
|
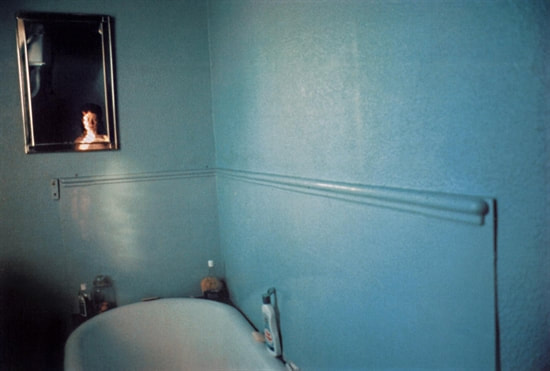
Nan Goldin - Slef portrait in blue
|
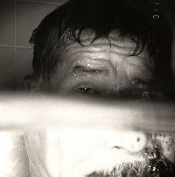
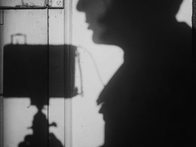
Selfie Experiment #2: The Obscured Selfie
There are several examples of photographic Selfies in which the subject's face is obscured. This effect is a special feature of photography that doesn't feature so much in painting. The camera flattens three dimensional space so that something in the foreground can appear to be on the same level as something else in the background. Of course, some of the obscuring can be done after the fact. Look at these examples and then experiment with making your own Obscured Selfies.
There are several examples of photographic Selfies in which the subject's face is obscured. This effect is a special feature of photography that doesn't feature so much in painting. The camera flattens three dimensional space so that something in the foreground can appear to be on the same level as something else in the background. Of course, some of the obscuring can be done after the fact. Look at these examples and then experiment with making your own Obscured Selfies.

Lee Friedlander - Self Portrait
|
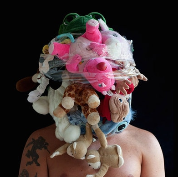
Edu Monteiro - Autoerrotrato Sensorial
|
|
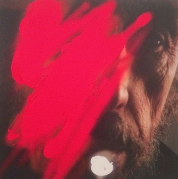
Richard Hamilton - Self Portrait with red
|
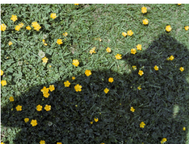
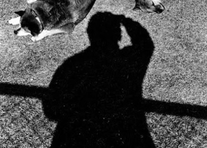
Selfie Experiment #3: The Shadow Selfie
A shadow is like a photograph of ourselves, an image made by light (and the absence of it). Photographers are particularly sensitive to effects of light and so have long been interested in their own shadows. Experiment with your own Shadow Selfies, exploring a variety of effects and compositions.
A shadow is like a photograph of ourselves, an image made by light (and the absence of it). Photographers are particularly sensitive to effects of light and so have long been interested in their own shadows. Experiment with your own Shadow Selfies, exploring a variety of effects and compositions.
Vivian Maier 1975
|

Umbo Otto Umbehr 1928
|
Daido moriyama 1997
|
Andre Kertesz 1927
|
Lighting
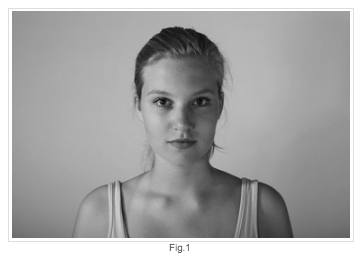
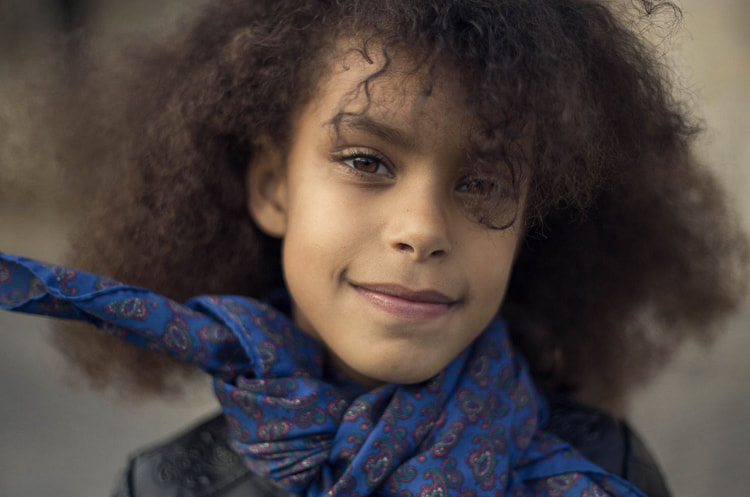
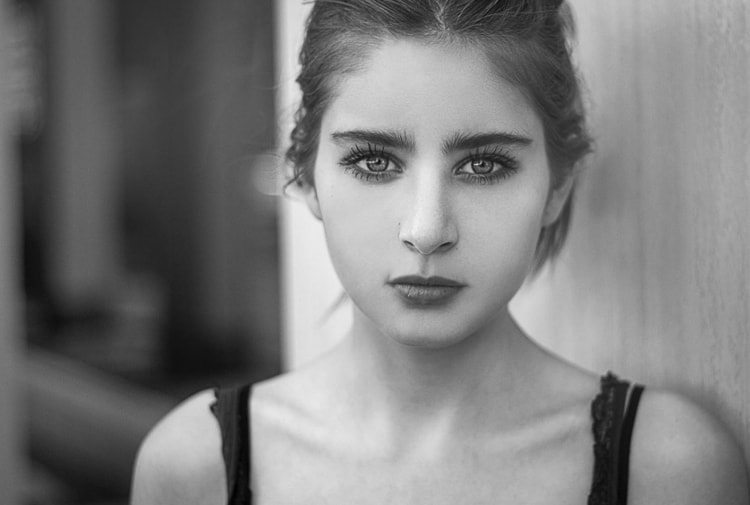
Lighting can make a huge difference to the look and impact of your portraits. We would like you to take portraits of your classmates and experiment with different types of lighting
Natural Lighting
Shoot in manual mode , You will need a minimum shutter speed of around 1/100th of a second (or faster).
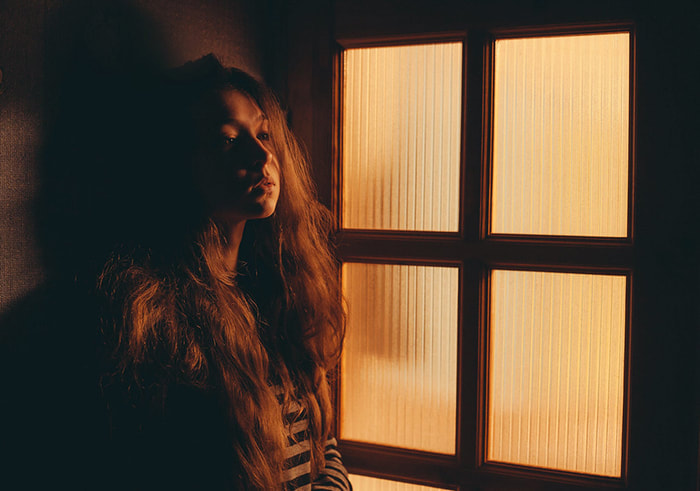
1 – Use window light, it will give you a very nice soft light on your model’s face.
2 - Take your model outside and take the portrait in direct light and shadowed areas
Lighting can make a huge difference to the look and impact of your portraits. We would like you to take portraits of your classmates and experiment with different types of lighting
Natural Lighting
Shoot in manual mode , You will need a minimum shutter speed of around 1/100th of a second (or faster).
1 – Use window light, it will give you a very nice soft light on your model’s face.
2 - Take your model outside and take the portrait in direct light and shadowed areas
|
|
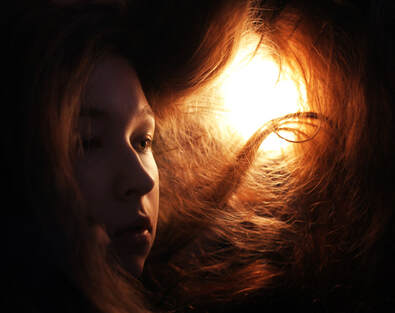
Tungsten Light
Tungsten light is warm artificial light. It’s usually orange or yellow.
You probably have it at home in your oven, bathroom, and kitchen. It’s also common in lamps, street lights, and theatre stage lights. It exists in many places, yet it’s something photographers overlook very often.
Tungsten light is warm artificial light. It’s usually orange or yellow.
You probably have it at home in your oven, bathroom, and kitchen. It’s also common in lamps, street lights, and theatre stage lights. It exists in many places, yet it’s something photographers overlook very often.
|
|
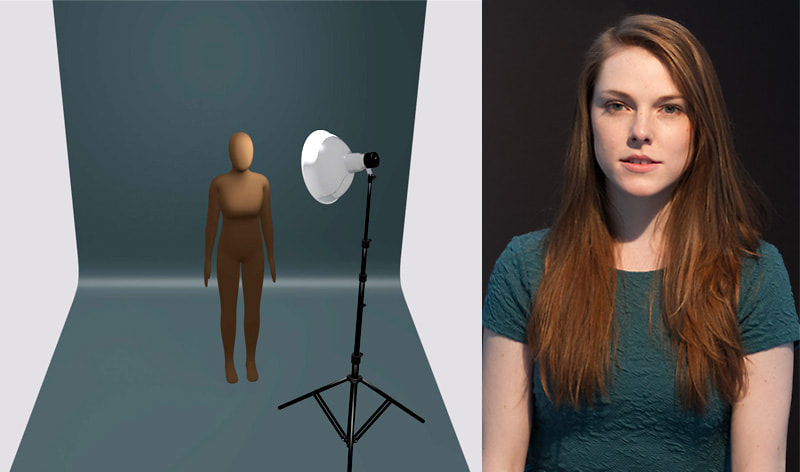
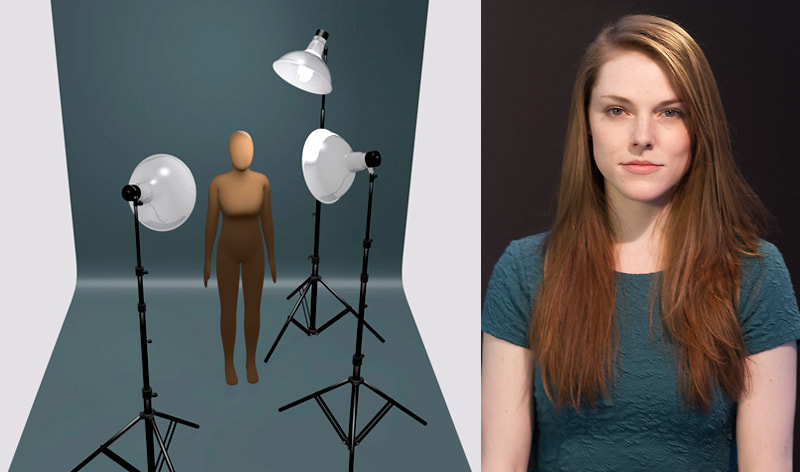
Continuous lighting - Set up the studio lights in the following set up and experiment with your model in the studio set up
|
Place The Main Light First
With your subject in place, generally facing the camera, you'll want to place your main light just above her head and to one side. Look at where the shadows fall and adjust the position of the light until you like what you see. For basic portraits, shorter shadows are best and you'll get those by moving the light closer to the front of the subject's face rather than far off to one side. Lower, rather than higher light positions will also create shorter shadows. |
|
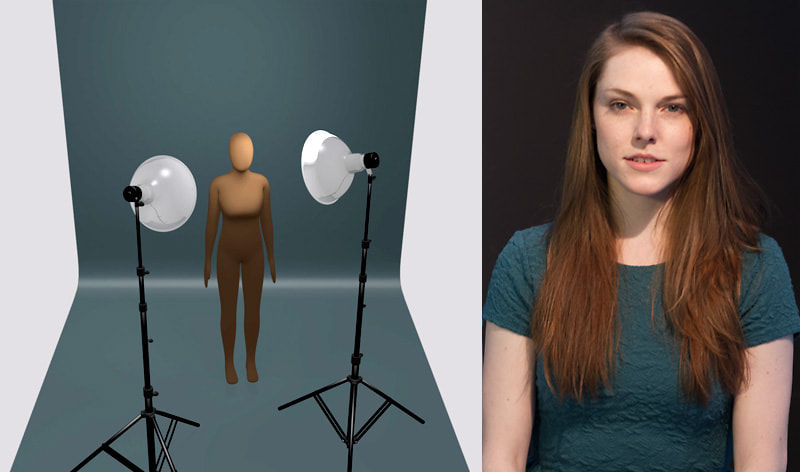
The Fill Light
This light is much less intense than the main, which is a good thing, because the fill light should not match or overpower the main light; it should be just enough to fill in the shadows as you see fit. |
|
The Hair Light
The other light will be positioned above the subject and pointed down to strike her hair. Notice that the light doesn't have to be perfectly centered above her head, it's okay to have it off to one side a bit. |
